



Publicado: 25 August 2026
Última actualización: 25 August 2026
Tiempo de lectura: 9 minutes
Author: [Not specified]
Reviewer: [Not specified]
Introduction: Why Loader and Unloader Maintenance Matters in SMT Production
Picture this. It’s a Tuesday morning in August 2026, your SMT line is humming along nicely, and then suddenly everything stops. The reflow oven is fine. The pick-and-place machine is waiting happily. But your loader has thrown a tantrum, and now the entire production run is stuck.
Sound familiar? This happens more often than most people expect. A dirty magazine sensor or a worn conveyor belt on your PCB loader can bring a million-dollar SMT line to its knees, even when every other machine is working perfectly.
Here’s the thing though. Most of these stoppages are completely preventable with the right maintenance approach.
Loader and unloader maintenance is one of those tasks that gets pushed to “later” until suddenly it becomes “right now” and costs you a fortune in downtime. We’re talking about magazine elevators that refuse to lift, pushers that misalign, and sensors that trigger false errors at the worst possible moment.
So what loader unloader maintenance is actually required to keep your line running smoothly? What does proper preventive maintenance look like, and how is it performed without disrupting your production schedule?
That’s exactly what we’re diving into today.
In this guide, we’ll walk through the complete maintenance picture: from daily checks to quarterly overhauls, common faults and what they mean, step-by-step service procedures for safe maintenance, and how to set the right frequency for high-volume production environments.
Whether you’re running a 24/7 smartphone assembly line or handling sensitive automotive electronics, this article will help you understand what maintenance your loader and unloader actually needs, why it matters, and how to do it without turning your production floor into a circus.
Author Credentials and Technical Basis
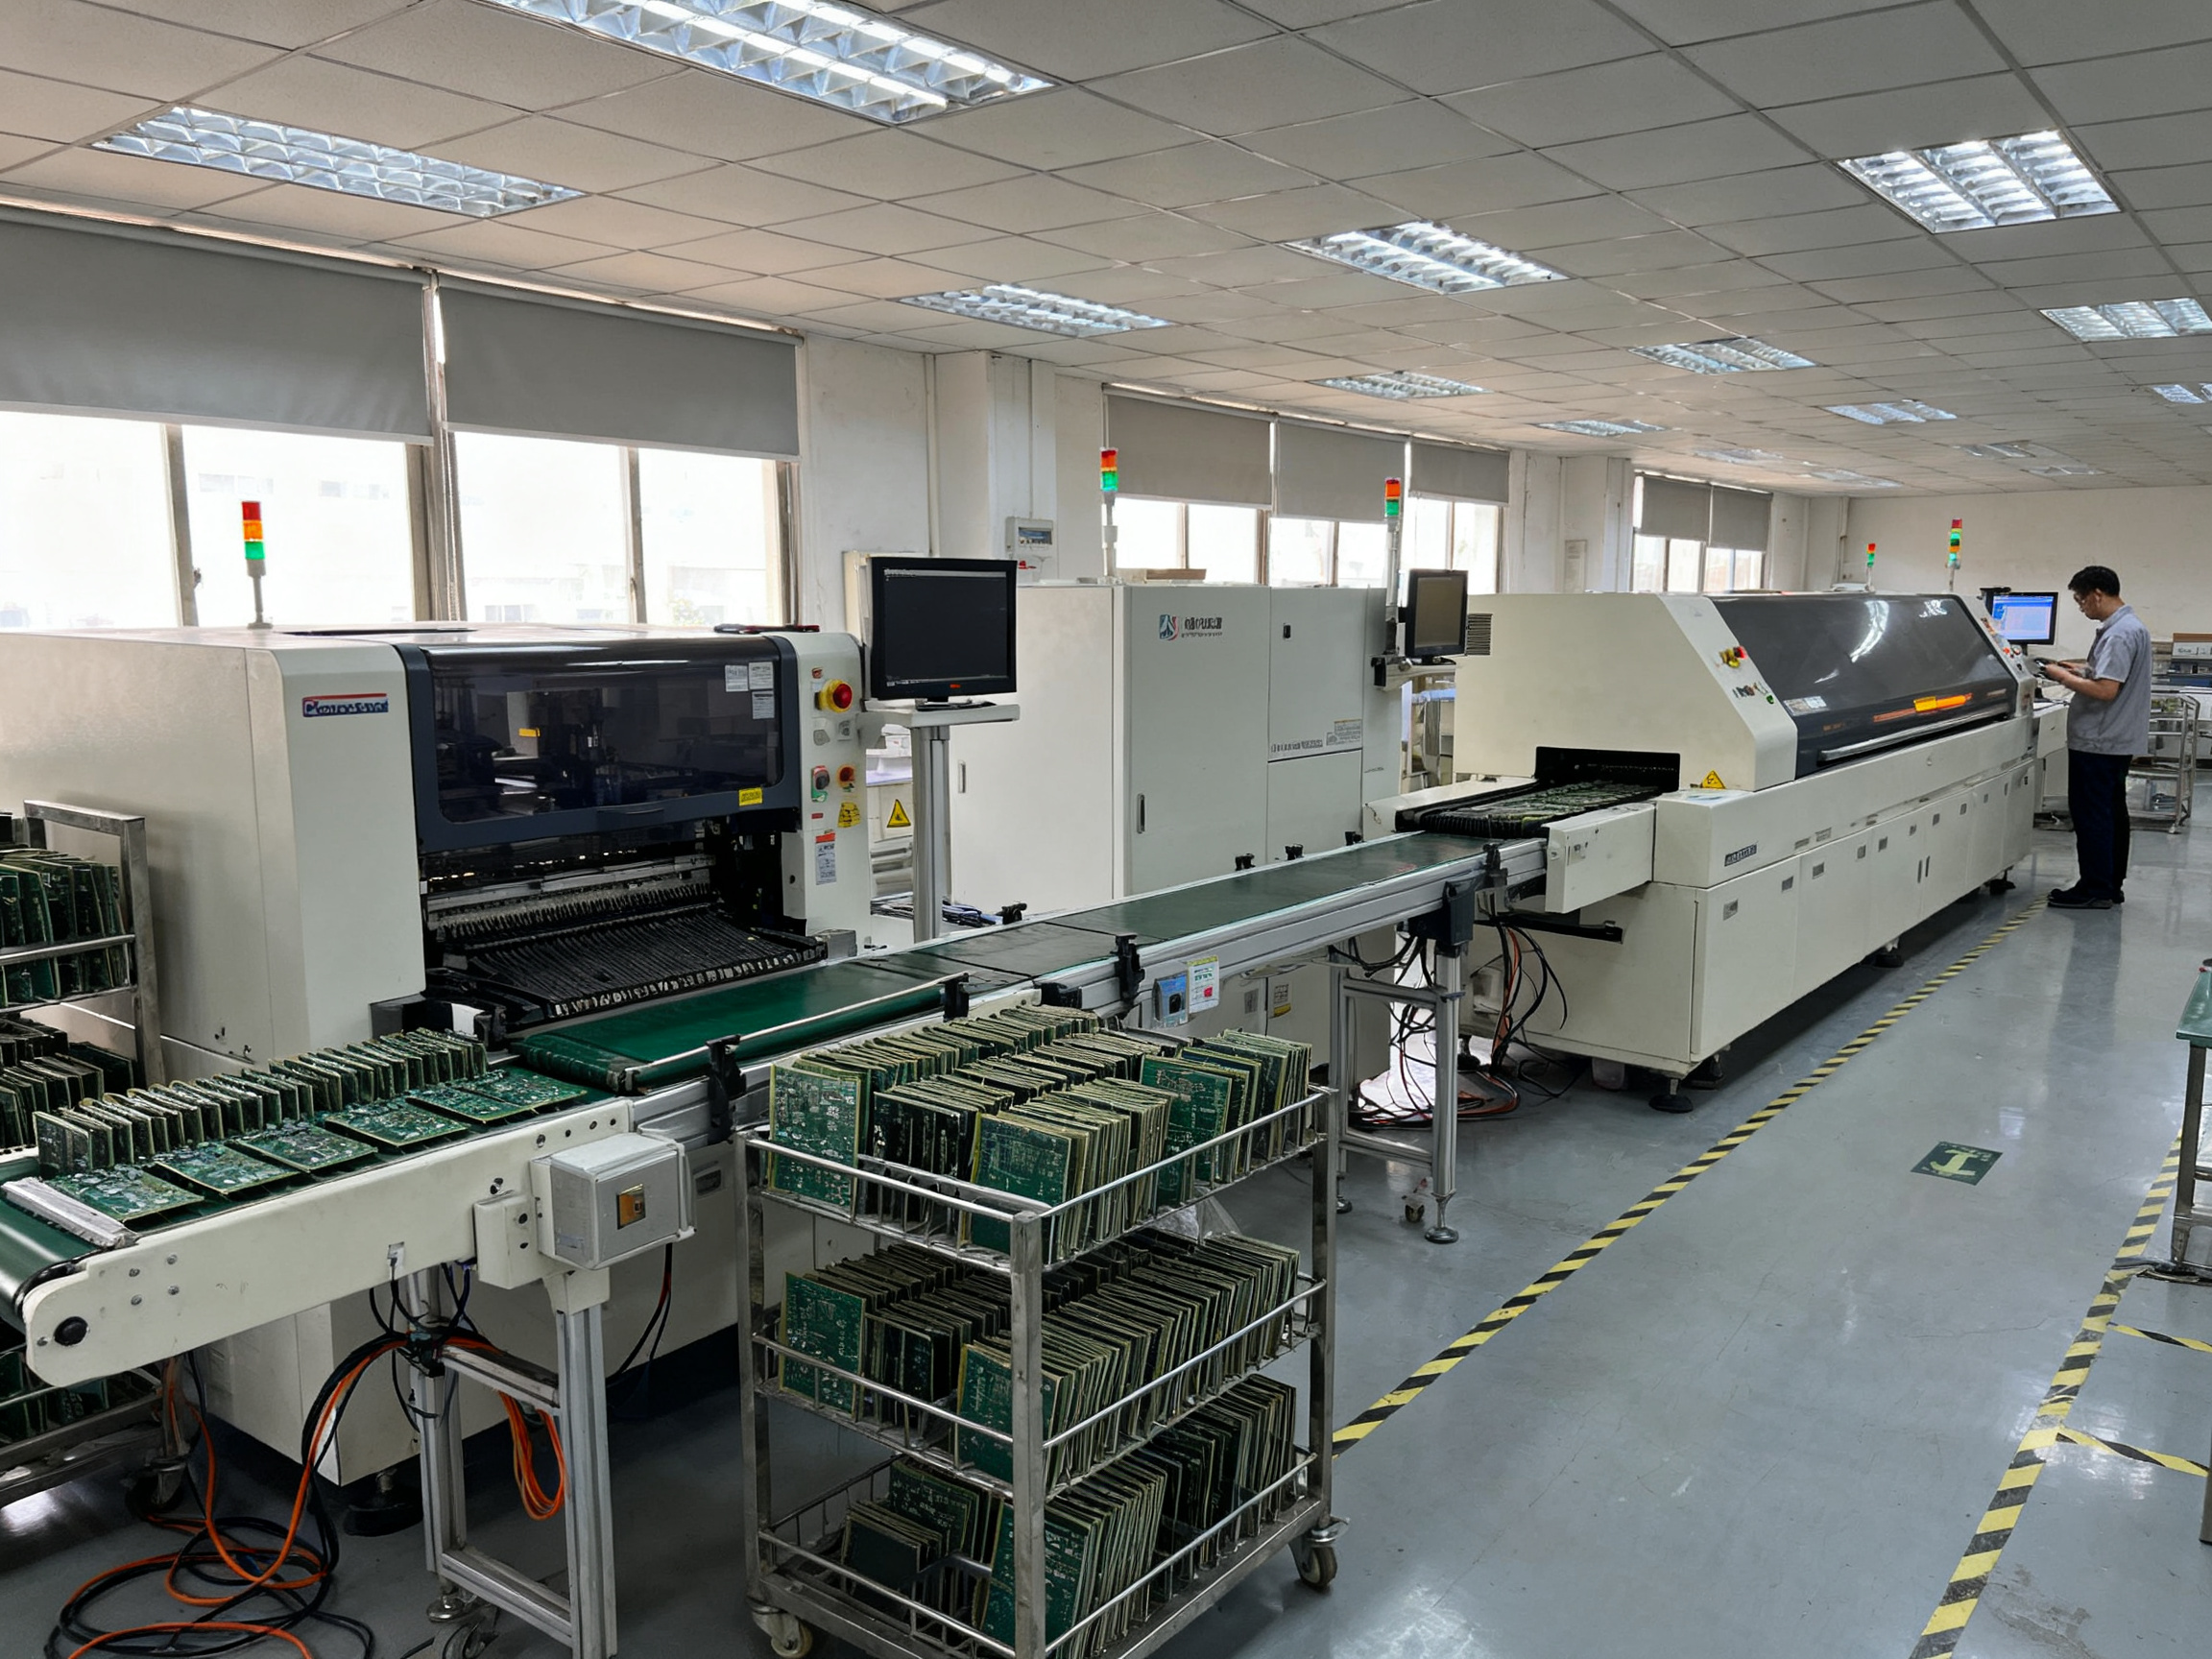
Prepared by the SMT equipment technical team at Shenzhen Chuxin Electronic Equipment Co., Ltd., this guide draws on documented service procedures and field maintenance practices for PCB handling equipment. The team works directly with loader and unloader systems, magazine transfer mechanisms, conveyor interfaces, and SMEMA communication protocols on a daily basis. Every maintenance step described here reflects what our engineers have seen work, and fail, on real production floors running smartphone, semiconductor, automotive, and military electronics lines. When we talk about pneumatic actuator servicing or conveyor alignment checks, we are talking about procedures our technicians perform during normal service calls. Nothing in this article is guesswork.
What Loader and Unloader Maintenance Includes
Before we get into the checklist, let’s talk about what we’re actually maintaining. An SMT loader is a machine that takes empty PCB magazines and feeds individual boards into your production line one at a time. The unloader does the opposite, collecting finished boards back into magazines at the line’s end. Both are magazine handling systems, and both have multiple subsystems that need regular attention.
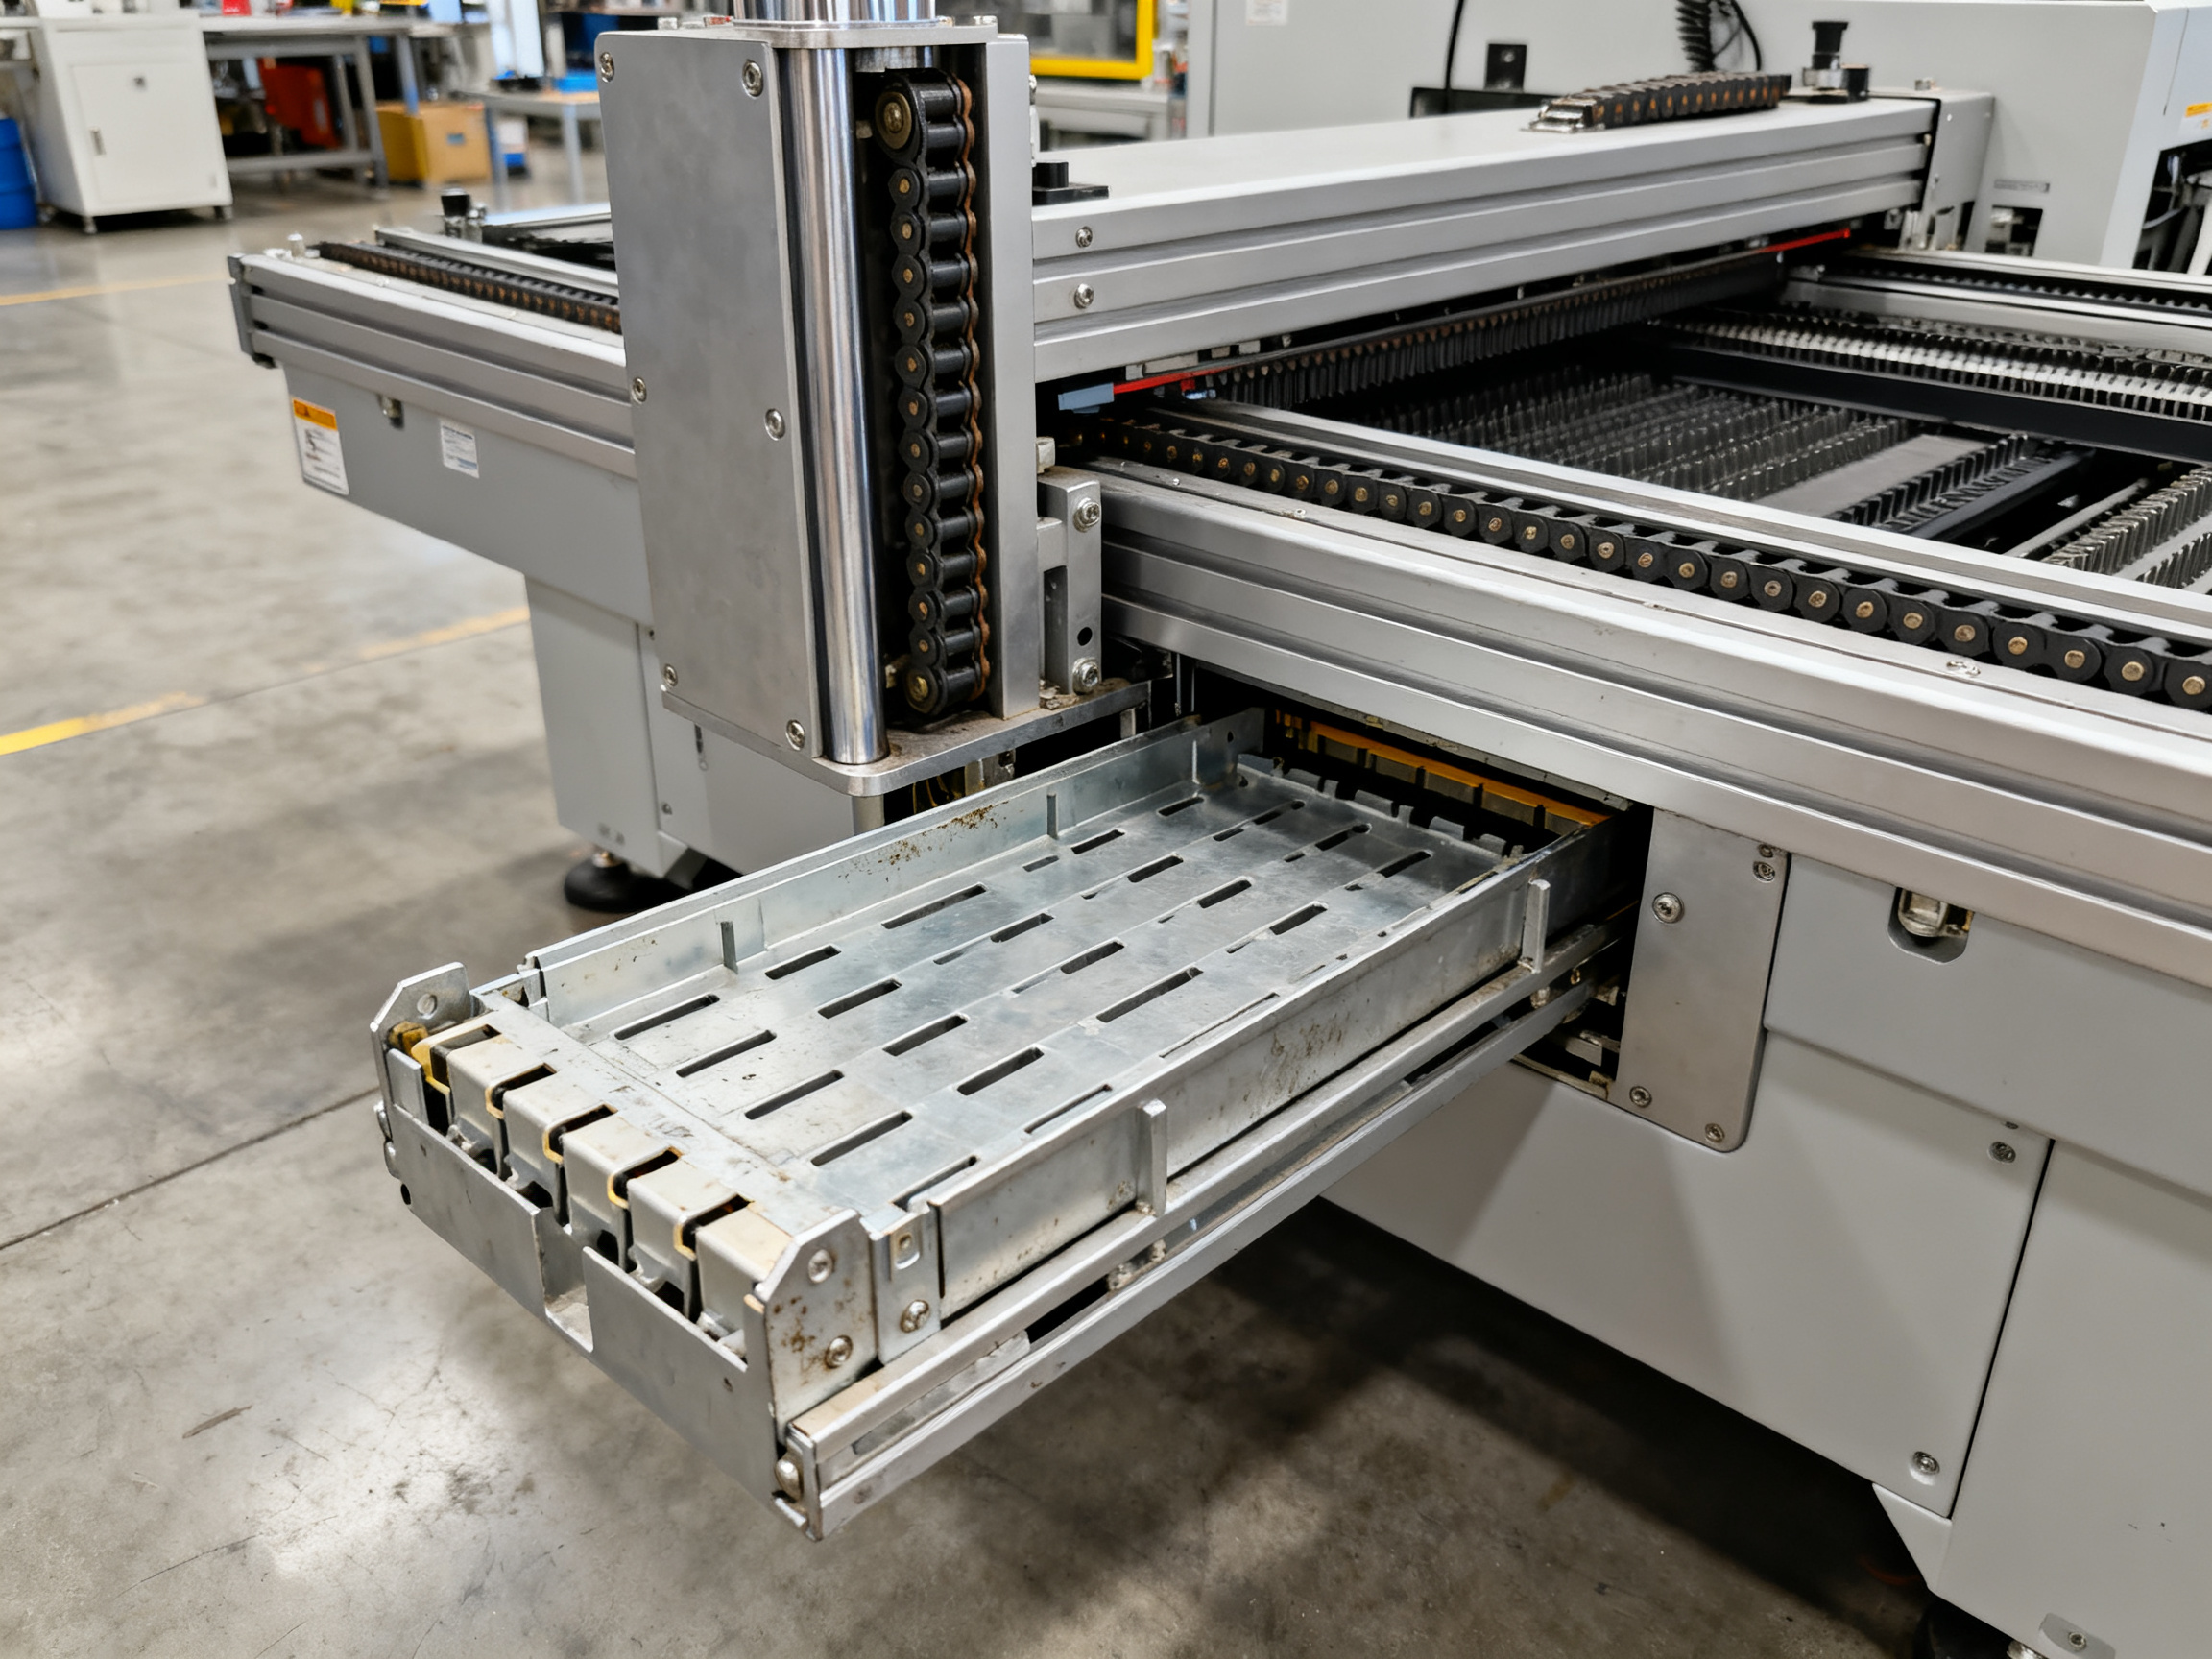
The key maintenance areas include magazine elevators that lift and position magazines, conveyor rails that guide boards through the machine, belts and chains that drive the transport mechanism, push plates that separate boards from the stack, clamps that hold boards during transfer, sensors that detect board position and magazine status, pneumatic components like cylinders and valves, the electrical cabinet with its PLC and wiring, the touch panel for operator interface, and SMEMA communication hardware for line integration.
Here’s something that trips up a lot of teams though. Not all maintenance is the same type of work, and confusing them leads to either neglected equipment or wasted budget.
| Subsystem | Function | Typical Failure Symptoms | Maintenance Task |
|—|—|—|—|
| Magazine Elevator | Lifts and positions magazines | Motor overload, magazine jams, pitch errors | Motor current check, magazine fit verification |
| Conveyor Rails | Guides boards through machine | Board jams, alignment drift, edge damage | Rail width check, cleaning, alignment |
| Belts and Chains | Drives transport mechanism | Slipping, skipping, breakage | Tension and wear inspection |
| Push Plate | Separates boards from stack | Misstroke, board damage, double-feeds | Pusher height verification |
| Sensors | Detects board and magazine position | False triggers, missed detections | Cleaning, sensitivity testing |
| Pneumatic Components | Provides linear motion | Slow response, air leaks, weak force | Pressure check, leak test, cylinder service |
| SMEMA Interface | Communicates with line equipment | Handshake failures, signal errors | Cable check, I/O status verification |
Routine operator checks are quick visual inspections done daily, taking just a few minutes. Mantenimiento preventivo is scheduled work like cleaning, lubricating, and replacing wear parts based on time or cycle counts. Corrective service happens when something breaks and needs fixing. Calibration and alignment ensures the machine meets original specifications after repairs or drift.
Each type serves a different purpose, and knowing which one you’re doing helps you plan the right resources and schedule.
Preventive Maintenance Checklist for SMT Loaders and Unloaders
Here’s where the rubber meets the road. A solid preventive maintenance routine keeps your loader and unloader running without those nasty surprise stoppages that kill your production numbers.
The key is breaking tasks into the right time intervals. Hit things too often and you’re wasting resources. Too rarely and you’re courting disaster.
Daily Checks (Just 5 to 10 Minutes)
Before your line starts each shift, do these quick checks:
- Power-off safety verification completed
- Machine surfaces wiped clean (dust, debris, PCB fragments gone)
- Magazine elevator moves smoothly with no grinding or hesitation
- Photoelectric sensors cleaned and confirmed clear
- Visual scan for loose wires, damaged cables, any obvious damage
- Conveyor rails free of debris and contamination
Weekly Checks (About 30 Minutes)
Once a week, dig a little deeper:
- Transport chain tension checked, wear inspected
- Ball screw and lift mechanism cleaned and lubricated
- Pneumatic cylinders tested for smooth operation (no sticking)
- Air supply fittings inspected for leaks or damage
- SMEMA interface handshake signals verified
- Functional test in both automatic and manual modes
Monthly Checks (1 to 2 Hours)
Monthly maintenance takes more time but catches problems before they escalate:
- All movable shafts and guide rails lubricated per OEM specs
- Gearbox oil level checked, leak inspection performed
- Grounding and electrical continuity verified
- Wear parts inspected (belts, gears, chains)
- Loading and unloading arms and magazine position alignment checked
- Emergency stop and safety functions tested
Quarterly and Semi-Annual Checks (Half Day)
Every few months, go all in:
- Full alignment verification across all subsystems
- Belt tension measured and adjusted
- Feeder audits completed
- Calibration verified using certified glass boards
- Electrical cabinet inspection (wiring, terminals, components)
- Safety systems certified
Expert Tip: Use magazine transfer smoothness, rail cleanliness, and pneumatic response as early warning indicators before PCB jams occur. When these start degrading, problems are usually still small. But wait too long and you’re looking at a full line stoppage instead of a simple fix.
Here’s a quick reference table that ties everything together:
| Frequency | Key Tasks | Acceptance Criteria | Who Handles This |
|—|—|—|—|
| Daily | Surface clean, sensor wipe, visual inspection | No debris, sensors clear, no obvious damage | Operator |
| Weekly | Chain tension, lubrication, SMEMA check, mode test | Smooth motion, handshake confirmed | Technician |
| Monthly | Full lubrication, wear inspection, alignment check, safety test | Within OEM specs, all functions safe | Maintenance engineer |
| Quarterly | Full audit, calibration, electrical inspection | Meets original specifications | Senior technician |
For high-volume lines running 24/7, you need to compress these intervals. Lines above 70% capacity typically need 20 to 30 percent tighter schedules. Weekly checks become every 4 to 5 days. Monthly tasks shift to every 2 to 3 weeks.
The best approach though? Track your actual failure patterns. If your conveyors always act up around week three, schedule maintenance at week two instead. Numbers don’t lie.
Common Loader and Unloader Faults and What They Usually Indicate
When your loader or unloader throws a fault, the alarm message on the screen does not always tell you where the problem actually is. A “magazine lift error” might point to the elevator motor, but the real culprit could be a bent magazine slot in your input rack.
This is why knowing how to read fault symptoms matters so much. Let me walk you through the most common issues we see on production floors, what they usually mean, and how to trace them back to the root cause.
Mechanical Faults
PCB jams lead the pack here. They happen when bent magazine slots catch boards during extraction, when pusher height is out of spec and nudges boards sideways, or when board warpage causes it to hang up on the conveyor rails instead of sliding through cleanly. The fix is usually obvious once you open the machine and look.
Magazine not lifting errors typically point to motor overload or pitch setting problems. The motor trips because something is resisting the lift, maybe debris in the elevator channel or a damaged lead screw. Pitch setting errors happen when the magazine spacing value in the PLC does not match your actual magazine dimensions. Boards get pushed into the wrong slot or the elevator stops at the wrong height.
Conveyor belt slipping creates inconsistent transfer speed. Boards arrive at the outfeed either too fast or too slow, and downstream machines cannot handle the timing mismatch. You will see this as a pattern of intermittent jams that shift around rather than happening at the same location every time.
Pusher misstroke is sneaky. The pusher might look like it is moving correctly, but if the height is off by even half a millimeter, boards ride up or drag. Rail width mismatch causes similar symptoms. Boards wobble side to side during transfer, and thin boards can even fall through the gap.
Control and Sensing Faults
Sensor misdetection causes more false alarms than almost anything else. Photoelectric sensors collect dust and flux spatter, and when the light beam weakens, the sensor triggers randomly or misses boards entirely. Cleaning the sensor lens with electronics-safe solvent fixes most of these.
PLC alarm messages are not always helpful on their own. You need to check the fault log to see which input triggered the stoppage, then trace backward through the wiring to find the actual cause.
SMEMA handshake failures are frustrating because they involve two machines. The upstream machine sends “Board Available,” the downstream machine should respond with “Machine Ready.” If that conversation breaks down, nothing moves. Cable integrity, I/O status, and pin mapping all need verification.
Missing board signal and full magazine signal errors usually point to sensor problems first. The sensor might be dirty, misaligned, or genuinely failed. Check those before diving into PLC parameters.
Pro Insight: When your line stops, resist the urge to jump straight to the PLC or SMEMA settings. Most loader and unloader faults are mechanical or sensory in nature. Check for obstructions, look at sensor condition, verify air pressure, and confirm physical alignment before you start questioning signal logic. You will solve the problem faster and avoid chasing ghosts through your PLC program.
Fault Tracing Order
Here is the practical sequence we use when something goes wrong. Start simple, then move to complex:
| Fault Symptom | Check First | Check Second | Check Third | Escalate When |
|—|—|—|—|—|
| PCB jam | Inspect for debris and bent parts | Check pusher height | Verify rail alignment | Conveyor or frame damage |
| Magazine not lifting | Clear debris from elevator | Verify pitch settings | Check motor current | Lead screw or motor failure |
| Conveyor belt slipping | Check belt tension | Inspect belt for wear | Examine motor coupling | Drive motor or gearbox issue |
| Sensor misdetection | Clean sensor lens | Verify sensor alignment | Check wiring and connectors | Replace sensor |
| SMEMA handshake failure | Verify cable connections | Check I/O pin mapping | Test signal with multimeter | PLC communication module fault |
| PLC alarm | Read fault log | Check input status | Verify parameter settings | Replace PLC module |
| Emergency stop fault | Verify E-stop not pressed | Check safety circuit wiring | Test safety relay | Replace safety component |
Emergency stop faults usually mean someone hit the button, the door interlock triggered, or the safety circuit has a loose wire. Rarely is it the PLC itself.
Following this order saves time. You fix the simple stuff first, and only when that is ruled out do you dig into PLC logic or signal parameters. Most of the time, you never get past step two.
Step-by-Step Service Procedure for Safe Maintenance
Maintenance day is not the time for heroics. Rushing through procedures to get the line running costs way more than taking an extra 15 minutes to do things properly. Trust me on this one. I’ve seen technicians skip the lockout step, and nobody wants to be the person who discovers a still-pressurized pneumatic line the hard way.
Here’s the sequence that works for safely servicing your loader or unloader.
Before You Touch Anything: Lockout and Isolation
First, stop production and let the current cycle finish if possible. You do not want a board stuck halfway through when you cut power.
Next, isolate all energy sources. This means turning off the main power switch and locking it out. Attach your lockout tag with your name and the date. Then disconnect or lock out the compressed air supply at the source valve. Bleed any trapped pressure from the lines. Pneumatic systems hold pressure even after the main valve closes, so give it a moment.
Wait for all moving parts to come to a complete stop. The magazine elevator, pusher plates, and conveyor belts all need to stop moving before you open any access panels.
Confirm you have clear access to the work area. No part of your body should be in a pinch point zone when the machine restarts.
The Service Sequence
Once isolation is confirmed, follow this order:
- Visual inspection first. Look for obvious damage, loose hardware, frayed wires, or contamination before you touch anything.
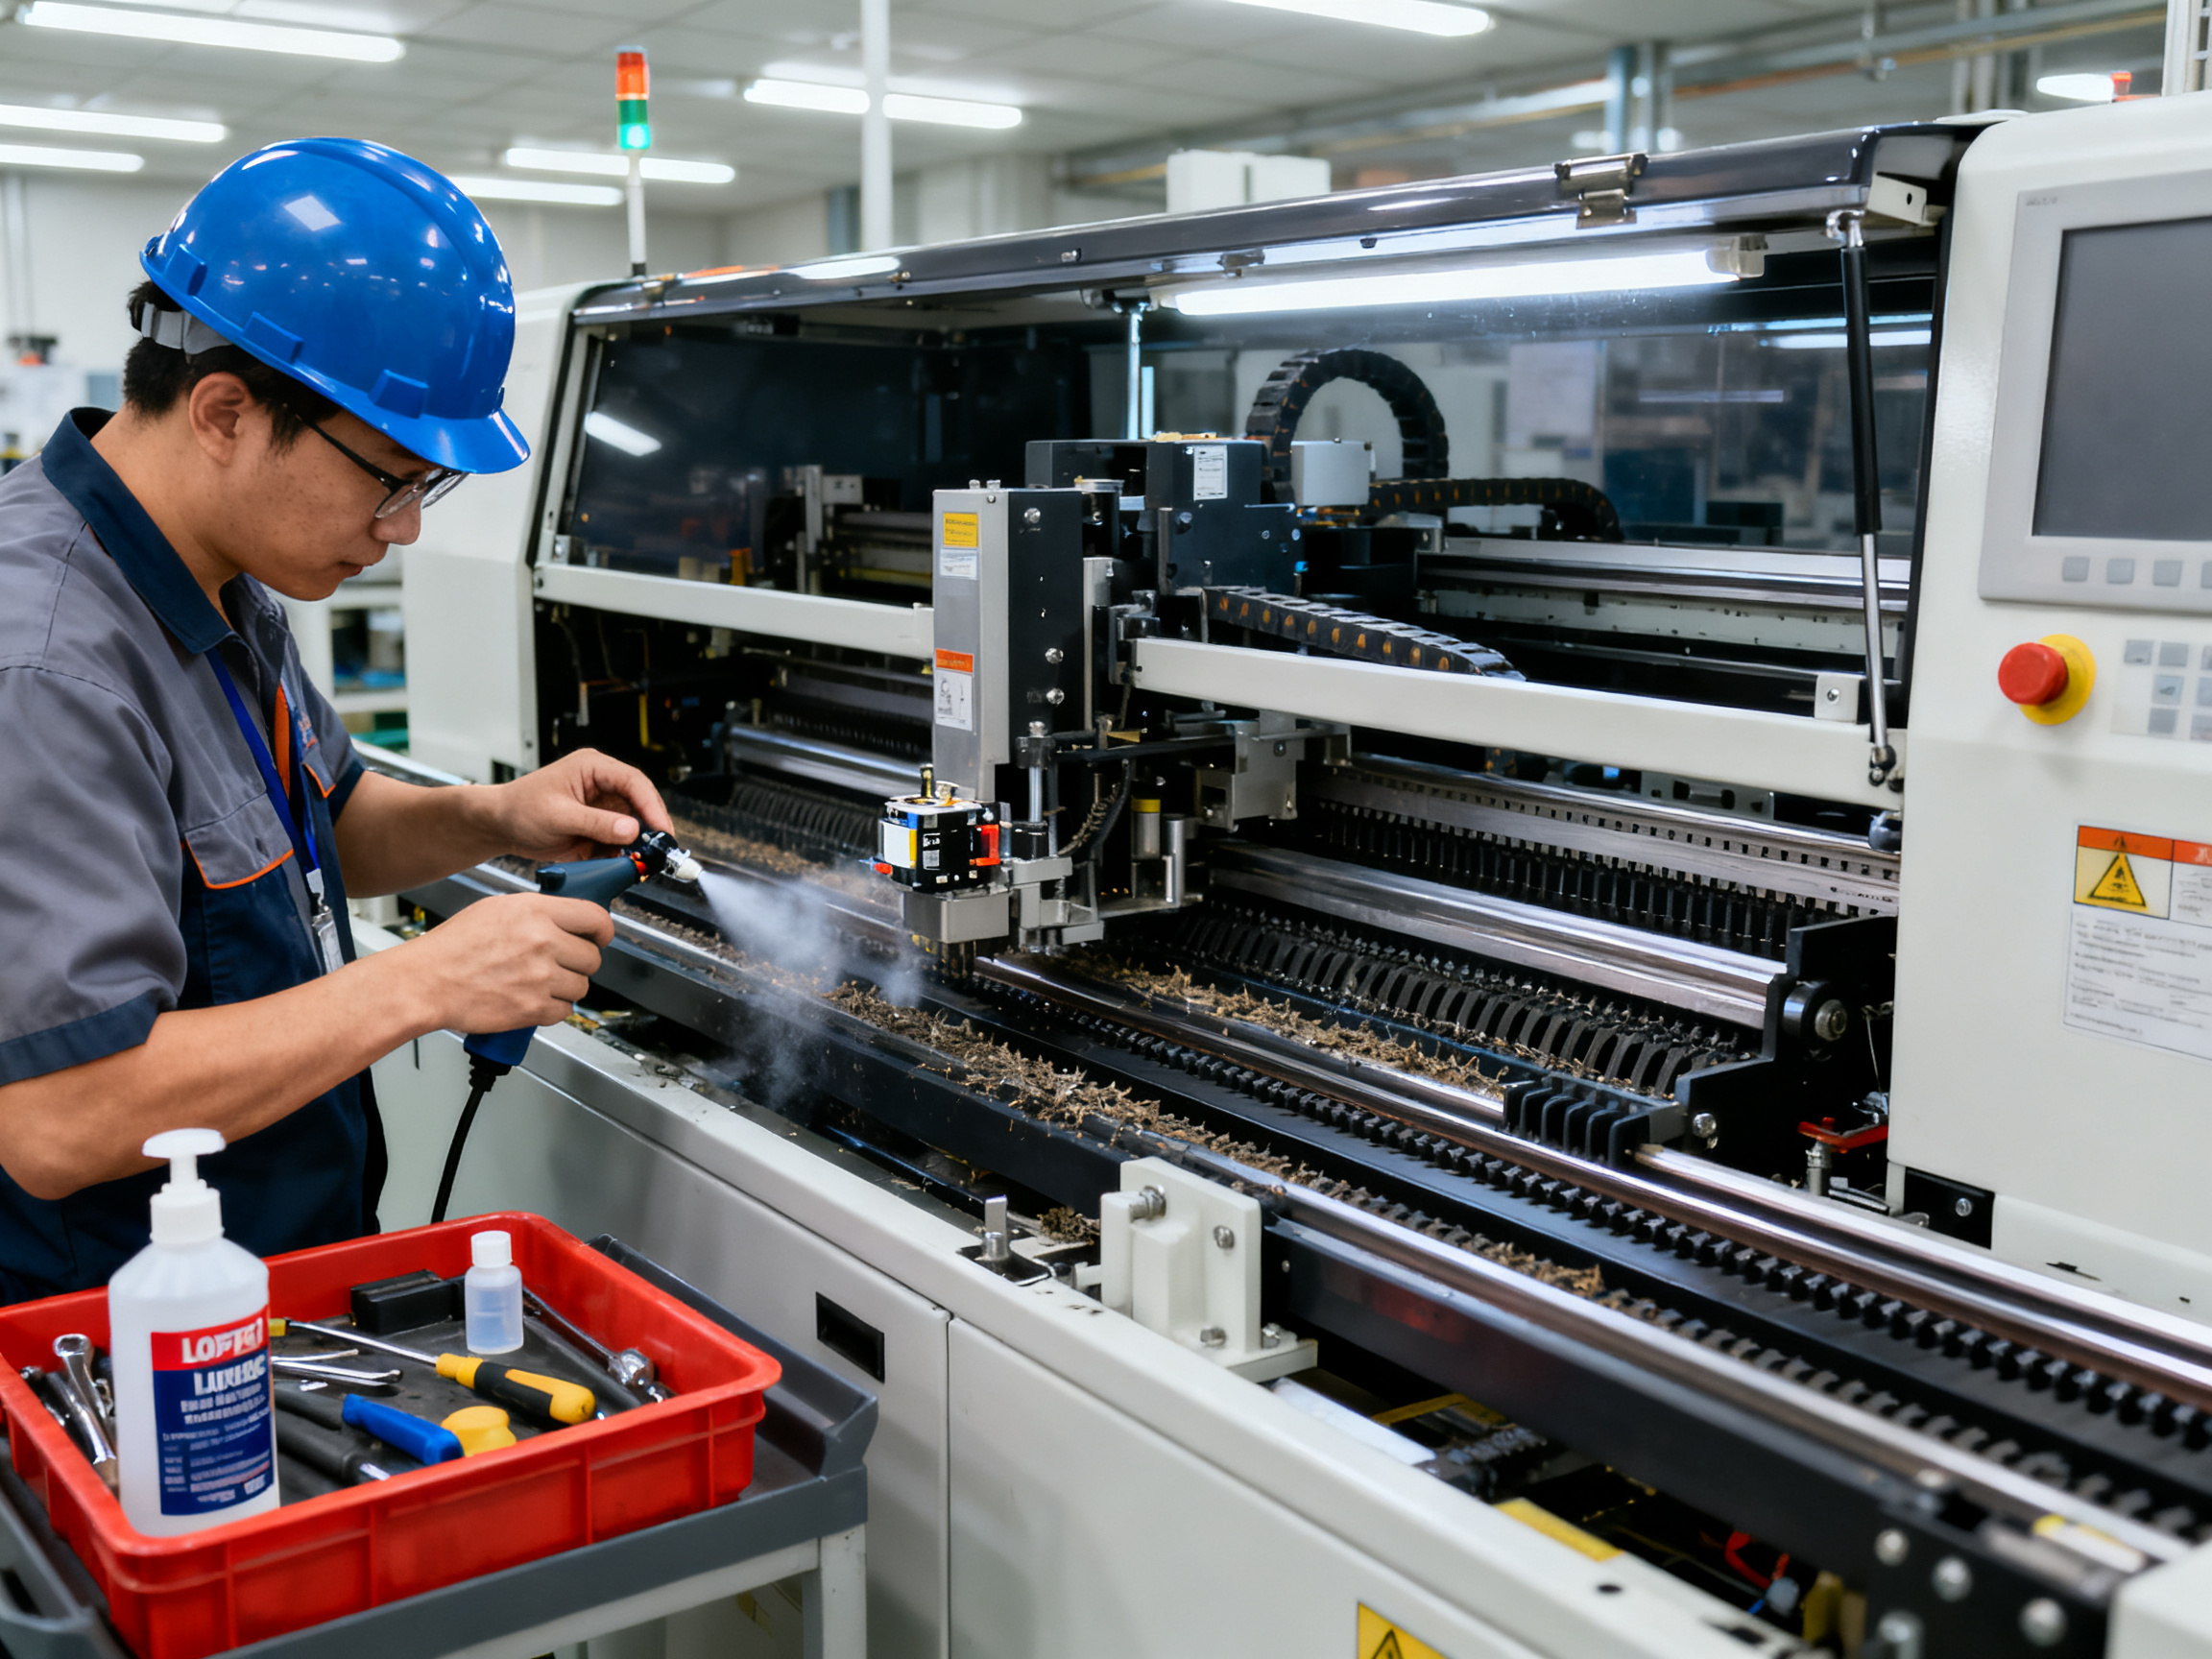
- Limpieza comes next. Remove dust, flux spatter, and debris from rails, sensors, and elevator channels. Use electronics-safe cleaners only.
- Mechanical tightening follows. Check all fasteners on conveyors, elevator mounts, and pusher assemblies. Vibration loosens things over time.
- Lubrication where approved by your OEM. Apply the correct lubricant to designated points only. Keep lubricants away from PCB travel surfaces.
- Sensor cleaning and position check. Clean photoelectric lenses, verify sensor alignment, and confirm they trigger correctly.
- Pneumatic leak check. Listen for hissing, check fittings, and verify cylinder operation is smooth.
- Conveyor alignment. Confirm rail width, board clearance, and transfer height match your product specs.
- Magazine elevator test. Run the elevator through its full range manually before switching to automatic mode.
- Dry-run cycle. Operate empty for several complete cycles to verify everything works before releasing for production.
Finishing Up: Validation Steps
After reassembly, run your validation checks in order. Start with empty-cycle tests using no boards. Then load dummy boards that match your production product. Verify SMEMA communication handshake with your upstream and downstream machines. Confirm alarm reset functions correctly and that fault screens clear properly. Finally, complete your maintenance log with the date, technician name, work performed, and any parts replaced.
Safety Reminder: Never bypass safety interlocks to speed up testing. Never reach into the magazine elevator zone while the machine is in any mode. Always verify zero-energy state before opening guards. These rules exist because people got hurt before they were written.
Documenting everything matters more than most technicians realize. When that same fault shows up three months later, your notes will tell you whether this is a recurring problem or something new.
How to Maintain PCB Handling Accuracy and Prevent Damage
When your loader or unloader is off, it does not just cause jams. It can quietly destroy boards in ways you will not see until they hit final test.
Board skew is the big one. If the conveyor rails are misaligned by even a millimeter or two, boards drift sideways as they travel. This gets extra problematic with BGA and QFN packages where the pads are already tight. You end up with solder joint voids or bridges, and your AOI might miss them because they are under the component.
A worn magazine slot causes similar trouble. The edges catch boards during extraction instead of letting them slide out cleanly. Before you know it, you have edge chips, delamination, or broken tooling holes on finished boards.
Rail width setting matters too. Set it too tight and boards wedge in. Set it too loose and they wobble around like they are on a bad carnival ride. Either way, you get defects.
Board-stop timing is another piece often overlooked. If the stop engages too late, boards overshoot. Too early and the pusher shoves boards into a wall that is not there yet. Both scenarios create problems, especially for thinner boards that can slip under a stop that is not positioned correctly.
And here is something most people forget about. Anti-static handling. ESD damage does not show up on the production floor. It shows up weeks later when the board is in a customer device and suddenly fails in the field. Nobody wants that conversation with their quality team.
For BGA/QFN assemblies specifically, board flatness before assembly matters a lot. Any warp from uneven pusher force or poor magazine support creates placement errors. Hidden joint defects follow. You will only find those with X-ray inspection, and by then you are already looking at expensive rework.
From Our Experience: We have seen high-volume smartphone lines lose thousands of boards to ESD damage before anyone thought to check the loader ESD grounding. The fix took one afternoon. The loss had been going on for three weeks.
| PCB Damage Prevention Checks | What to Verify |
|—|—|
| Rail width | Matches your board thickness exactly |
| Magazine slots | No wear, deformation, or burrs |
| Pusher height | Consistent across full stroke |
| Pusher force | Even pressure, no board lift |
| Board-stop timing | Synchronized with line speed |
| ESD grounding | All loader components grounded |
| Board flatness | No sag in magazine or on rails |
Keeping these in check protects your high-density assemblies. It keeps military electronics reliable, semiconductor boards functional, automotive modules passing inspection, and smartphone PCBs working right out of the reflow oven.
How to Set Maintenance Frequency for High-Volume SMT Lines
Here’s the thing. There is no magic maintenance schedule that works for every SMT line. Your frequency should match how hard your line actually works.
What drives your maintenance intervals
Start with line utilization. A line running 24/7 at 80% capacity needs more frequent attention than one running 6 hours a day. Board size variation matters too. If you are constantly switching between different product sizes, your loader mechanisms experience more wear from constant adjustments. Dust and flux exposure on your production floor plays a role as well. A cleanroom setup allows longer intervals than a standard factory floor with flux residue everywhere.
Shift patterns determine when you can actually perform maintenance. Single-shift lines have natural windows on evenings and weekends. 24/7 lines need to squeeze work into the lightest production periods, which usually means night shifts or early mornings. Magazine wear follows cycle counts more than calendar time, so high-volume lines wear out magazines faster. And your historical fault records tell you exactly where problems tend to cluster.
Suggested baseline intervals by production intensity
| Production Pattern | Preventive Maintenance | Deep Clean | Calibration | Full Audit |
|—|—|—|—|—|
| Single-shift (8 hours) | Monthly | Quarterly | Quarterly | Semi-annually |
| Two-shift (16 hours) | Bi-weekly | Monthly | Monthly | Quarterly |
| 24/7 continuous | Weekly | Monthly | Monthly | Quarterly |
These are starting points, not rigid rules. Adjust based on what actually happens on your floor.
Using data to refine your schedule
Track your maintenance logs, alarm history, MTBF trends, and first-pass yield data. When your MTBF starts dropping or FPY trends downward, move maintenance up. When you go six months without a single fault on a subsystem, you might be able to extend intervals slightly.
The numbers do not lie. Use them to build a schedule that fits your actual production reality.
From Our Experience: We have worked with 24/7 automotive and smartphone lines that adjusted maintenance intervals based on real failure data rather than generic recommendations. One smartphone line cut unplanned stoppages by 40% after shifting from monthly to bi-weekly preventive maintenance following three months of fault pattern analysis. The key was looking at their actual data instead of following a one-size-fits-all schedule.
When to Repair, Replace, or Upgrade Loader Unloader Equipment
At some point, every maintenance team faces the same question. Do we fix this loader again, or is it time to move on?
Here’s how to think it through.
Repair Candidates
Simple wear items are obvious repair work. Worn belts, dirty sensors, loose fasteners, misadjusted rails, air leaks, and damaged magazine guides all fall into this bucket. Parts are available, the fix is straightforward, and you are back running in a few hours. If your maintenance log shows sporadic faults on otherwise solid equipment, repair makes sense.
Time for Upgrade or Replacement
Recurring elevator faults tell a different story. If your magazine elevator keeps tripping motor overload despite multiple repairs, the mechanicals are probably fatigued. Obsolete PLC or HMI components create a different kind of problem. When your processor is discontinued and nobody stocks replacement modules anymore, you are one failure away from extended downtime. Unreliable SMEMA communication that never quite works right with newer downstream equipment, poor compatibility with current board sizes, or throughput that cannot keep up with your line speed are all signals that upgrade or replacement deserves serious consideration.
The Decision Framework
| Factor | Repair | Replace or Upgrade |
|—|—|—|
| Downtime cost | Low (fixable in hours) | High (recurring stops) |
| Spare parts | Readily available | Scarce or discontinued |
| Control systems | Supported and stable | End-of-life hardware |
| Production risk | Minimal | Escalating failure probability |
| Future needs | Fits roadmap | Cannot support expansion |
Run the math on total cost of ownership. If your loader costs more per year to maintain than it did to buy, replacement is probably overdue. Factor in production risk too. One catastrophic failure during a tight delivery window costs way more than the capital investment would have.
Compliance matters as well. If you need to support newer PCB formats or tighter tolerances for BGA assemblies, older equipment may simply not be capable no matter how much you repair it.
Conclusion: Build Loader Unloader Maintenance Into Line Reliability
Loader and unloader maintenance is not optional housekeeping. It is a core part of keeping your SMT line running at full speed.
When you treat magazine elevators, conveyor rails, sensors, and pneumatic systems as afterthoughts, you end up with preventable stoppages that cost thousands per hour in lost production. When you build a solid maintenance routine into your operations, you catch problems early, protect board quality, and keep deliveries on schedule.
The practical sequence works every time: inspect first, then clean, align, test sensors, verify pneumatic and SMEMA functions, run dummy boards, and document everything. Skip documentation and you lose the ability to spot patterns before they turn into line-stopping failures.
Your next steps:
- Standardize the daily and weekly checklists across your line
- Train operators to catch early warning signs before they become faults
- Review your fault history every month to spot recurring problems
- Plan service or upgrades before recurring stoppages start affecting your delivery dates
Quick Maintenance Recap Checklist
- Inspect and clean sensors and rails daily
- Check pneumatic response and SMEMA handshake weekly
- Verify alignment and calibration monthly
- Audit belts, chains, and wear parts quarterly
- Track faults and adjust intervals based on actual data
If your loader or unloader keeps causing problems despite regular maintenance, it might be time to look at replacement options. The math on downtime costs usually makes that decision pretty clear.
From Our Experience: We have worked with 24/7 automotive and smartphone lines that adjusted maintenance intervals based on real failure data rather than generic recommendations. One smartphone line cut unplanned stoppages by 40% after shifting from monthly to bi-weekly preventive maintenance following three months of fault pattern analysis. The key was looking at their actual data instead of following a one-size-fits-all schedule.
Prepared by the SMT equipment technical team at Shenzhen Chuxin Electronic Equipment Co., Ltd., this guide reflects documented service procedures and field maintenance practices for PCB handling equipment. When we talk about pneumatic actuator servicing or conveyor alignment checks, we are talking about procedures our technicians perform during normal service calls.