



Published: 29 August 2026
Reading Time: 10 minutes> Published: 29 August 2026
Reading Time: 10 minutes
Here’s something nobody talks about enough. When a PCB magazine loader goes down on a high-volume SMT line, you’re not just looking at repair time. You’re looking at a domino effect that hits your whole production schedule, your labor costs, and honestly? Your weekend plans, because somebody’s going to be on overtime.
In 2026, electronics manufacturers lose tens of thousands of dollars per hour when SMT lines go unplanned. The average hit for electronics manufacturing sits around $75,000 per hour, and that’s before you factor in scrapped boards, downstream quality issues, and the headaches your team deals with trying to catch up. A lot of these stoppages trace back to one thing: your PCB loader or unloader acting up.
Magazine jams. Sensor errors. PLC alarms that make no sense. Width-setting mismatches that shouldn’t be happening but are. We’ve all been there.

This guide walks through the best PCB loader troubleshooting software, guides, PDFs, kits, and courses available right now. Whether you’re a production manager trying to reduce repeat faults, a procurement lead comparing loader jam solutions vendors, or a technician who needs a solid troubleshooting kit for your SMT line, we’ve got you covered.
By Jace Liu.
We’re focusing on real-world resources for magazine loaders, PCB handling equipment, and automated SMT lines. No fluff. Just what works in 2026.
Quick Navigation
- Start With Loader Error Logs and PLC/HMI Diagnostics
- Verify Sensors, Cables, and Interlocks Before Adjusting Mechanics
- Use a Mechanical Troubleshooting Kit for Jams, Skew, and Misfeeds
- Follow IPC-HERMES-9852 and SMEMA Line Communication Guidelines
- Build a Loader Jam Solutions Checklist for High-Volume SMT Lines
- Review PCB Warpage and Handling Standards for Thin Boards
- Use Preventive Maintenance Guides and Checklists to Reduce Repeat Faults
- Consider a Loader Upgrade for Older Equipment
- Compare Troubleshooting Software, Guides, Kits, and Courses Before Buying
- Conclusion: Expert Recommendations for Choosing the Right Troubleshooting Resource## About the Author
Author credentials require verification. Jace Liu is listed as an SMT equipment sales and project management professional at Shenzhen Chuxin Electronic Equipment Co., Ltd. However, independently verified technical certifications, IPC qualifications, or formal engineering licensure have not been confirmed through third-party sources. This article should be read with the understanding that specialized credentials in SMT equipment troubleshooting have not been independently validated. For critical technical guidance, readers are encouraged to consult IPC-certified professionals or original equipment manufacturers directly.
1. Start With Loader Error Logs and PLC/HMI Diagnostics
Here’s the thing nobody tells you when you first start troubleshooting PCB loader issues: the machine usually knows what’s wrong before you do. Modern SMT loaders are packed with diagnostic software that logs everything from sensor states to servo positions, and that data is your first line of defense when something goes sideways.
Before you start poking around mechanically, pull up the HMI interface and check the error logs. Most loader systems store fault codes that point directly at the problem area. We’re talking about magazine lift faults that show up as specific alarm numbers, conveyor handoff failures that leave digital breadcrumbs, rail-width error codes that tell you exactly which axis is drifting, and sensor state mismatches that light up when something’s out of position.
I always start diagnostics the same way. Check the PLC status screen for IO states. Look at the servo log for any position errors. Then cross-reference those with the alarm history. Sounds simple, but you’d be amazed how many techs skip straight to physical inspection and miss what the software is trying to tell you.
Common HMI codes you’ll run into include magazine jam alerts (usually sensor-related), width-setting mismatches (check your board-size parameters), pusher faults (often mechanical but logged electrically), and communication errors with upstream or downstream equipment.
The best PCB loader troubleshooting software is usually the stuff already built into your machine. Spend time learning your HMI interface before you spend money on external tools.
| HMI/PLC Symptom | Likely Cause | First Check |
|—————-|————–|————-|
| Magazine jam alarm | Sensor blocked or misaligned | Clean sensor lens, check alignment |
| Rail-width error | Board size mismatch | Verify width setting vs magazine |
| Pusher fault | Mechanical obstruction | Inspect pusher path, check for debris |
| Comm error | Line handshake failure | Check SMEMA/hermes cable, test signals |

Getting familiar with your loader’s diagnostic suite pays off big time when you’re trying to cut that $75,000-per-hour downtime bill.## 2. Verify Sensors, Cables, and Interlocks Before Adjusting Mechanics
Let me share something that took me way too long to learn. I spent a whole afternoon adjusting rail heights on a loader that kept reporting jams. You know what the real problem was? A dusty photoelectric sensor that nobody had cleaned in weeks.
The lesson here is simple: always check your sensors before you touch anything mechanical.
Photoelectric sensors are the eyes of your PCB loader. They detect magazine position, board presence, and rail alignment. When these sensors get covered in dust, flux residue, or just general grime, they send false signals to the PLC. The machine thinks there’s a board when there isn’t, or reports a jam when the path is clear.
Common culprits include dusty sensor lenses, misaligned board-present sensors, frayed cables near moving joints, loose connectors from vibration, and worn E-stop or safety-door switches.
A quick sensor check takes maybe 15 minutes and can save you hours of downtime. Inspect lenses, check LED indicators, verify cable routing, and reseat connectors. Then run a controlled test cycle while watching the IO status screen on your HMI.
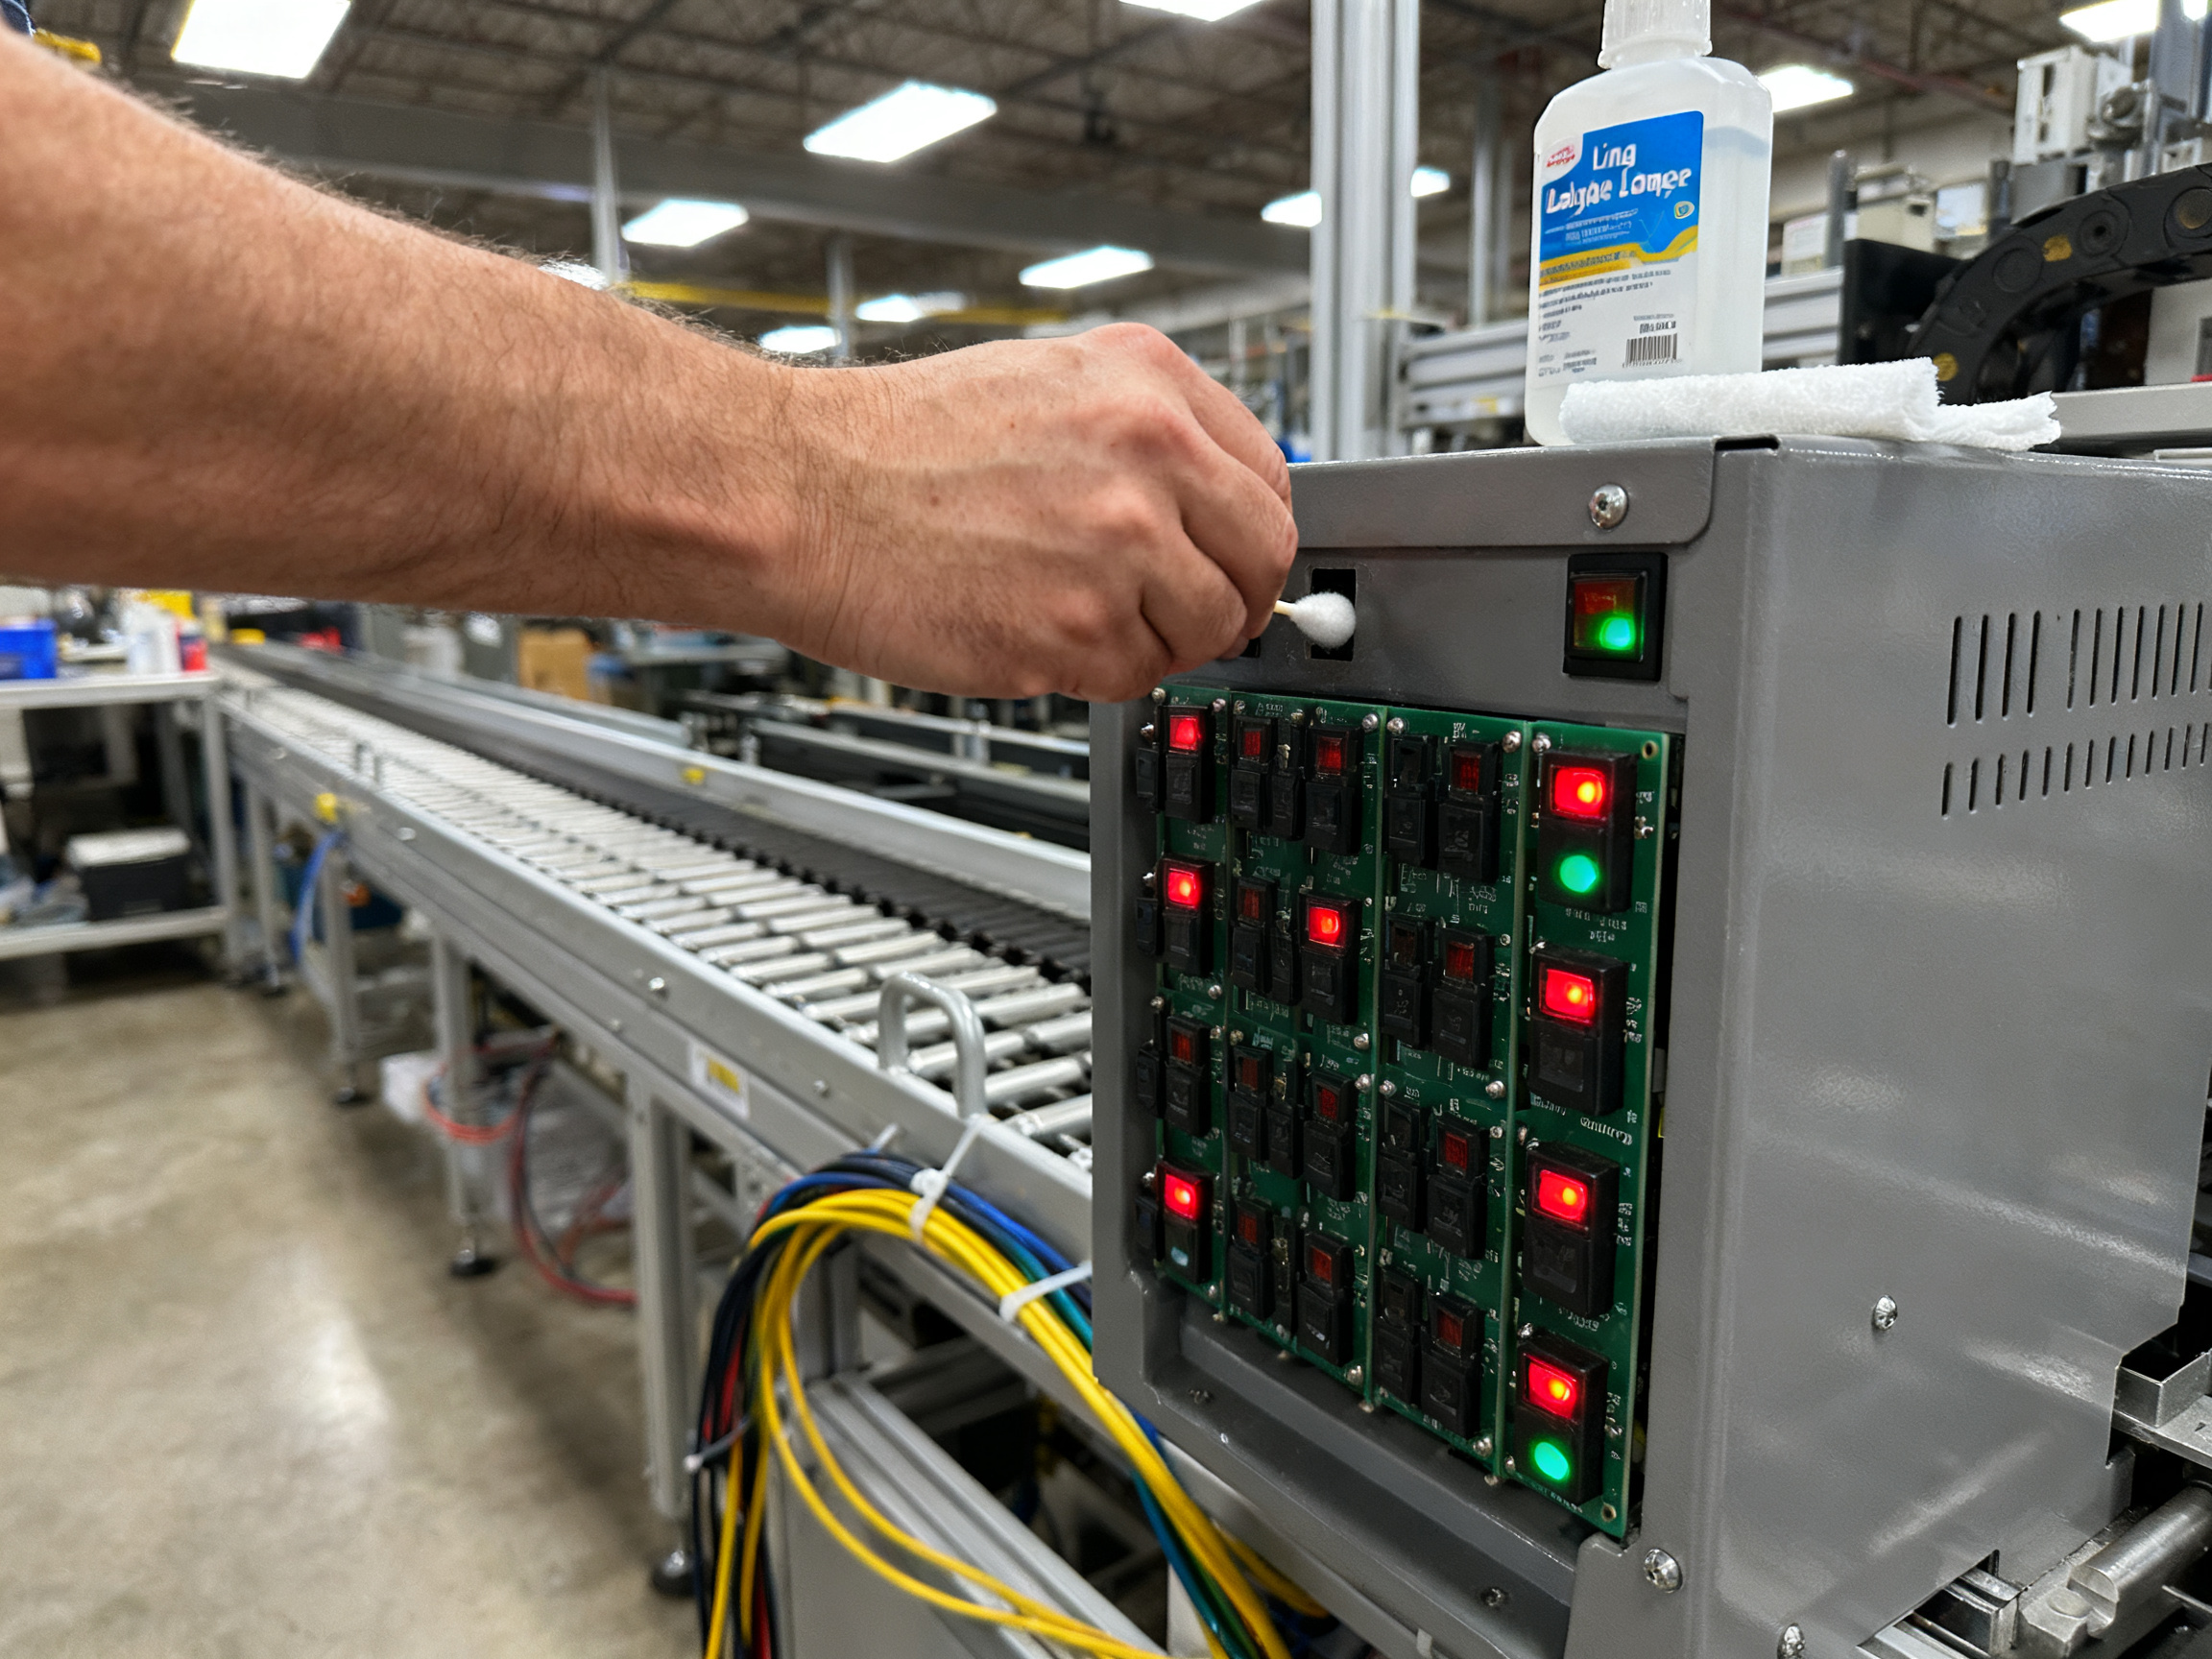
Expert Tip: Before touching any mechanical adjustment, systematically work through the sensor chain: magazine-present sensor, board-edge detect, pusher home position, and jam-clear sensor. A misaligned board-present sensor is one of the top reasons for false jam alarms in 2026 SMT loaders.
Here’s what I always tell the techs on my team: if you adjust rails, pushers, or conveyors without ruling out electrical causes first, you might fix the symptom but you’ll probably create a new problem. The sensor says something’s wrong, so find out what it’s actually seeing before you start moving mechanical parts around.## 3. Use a Mechanical Troubleshooting Kit for Jams, Skew, and Misfeeds
Here’s a question I get all the time: “What pcb loader troubleshooting tool do I actually need?” The honest answer is that you probably already own most of it. The difference between a tech who fixes loader jams in 20 minutes and one who takes all morning usually comes down to having the right tools organized and ready to go.
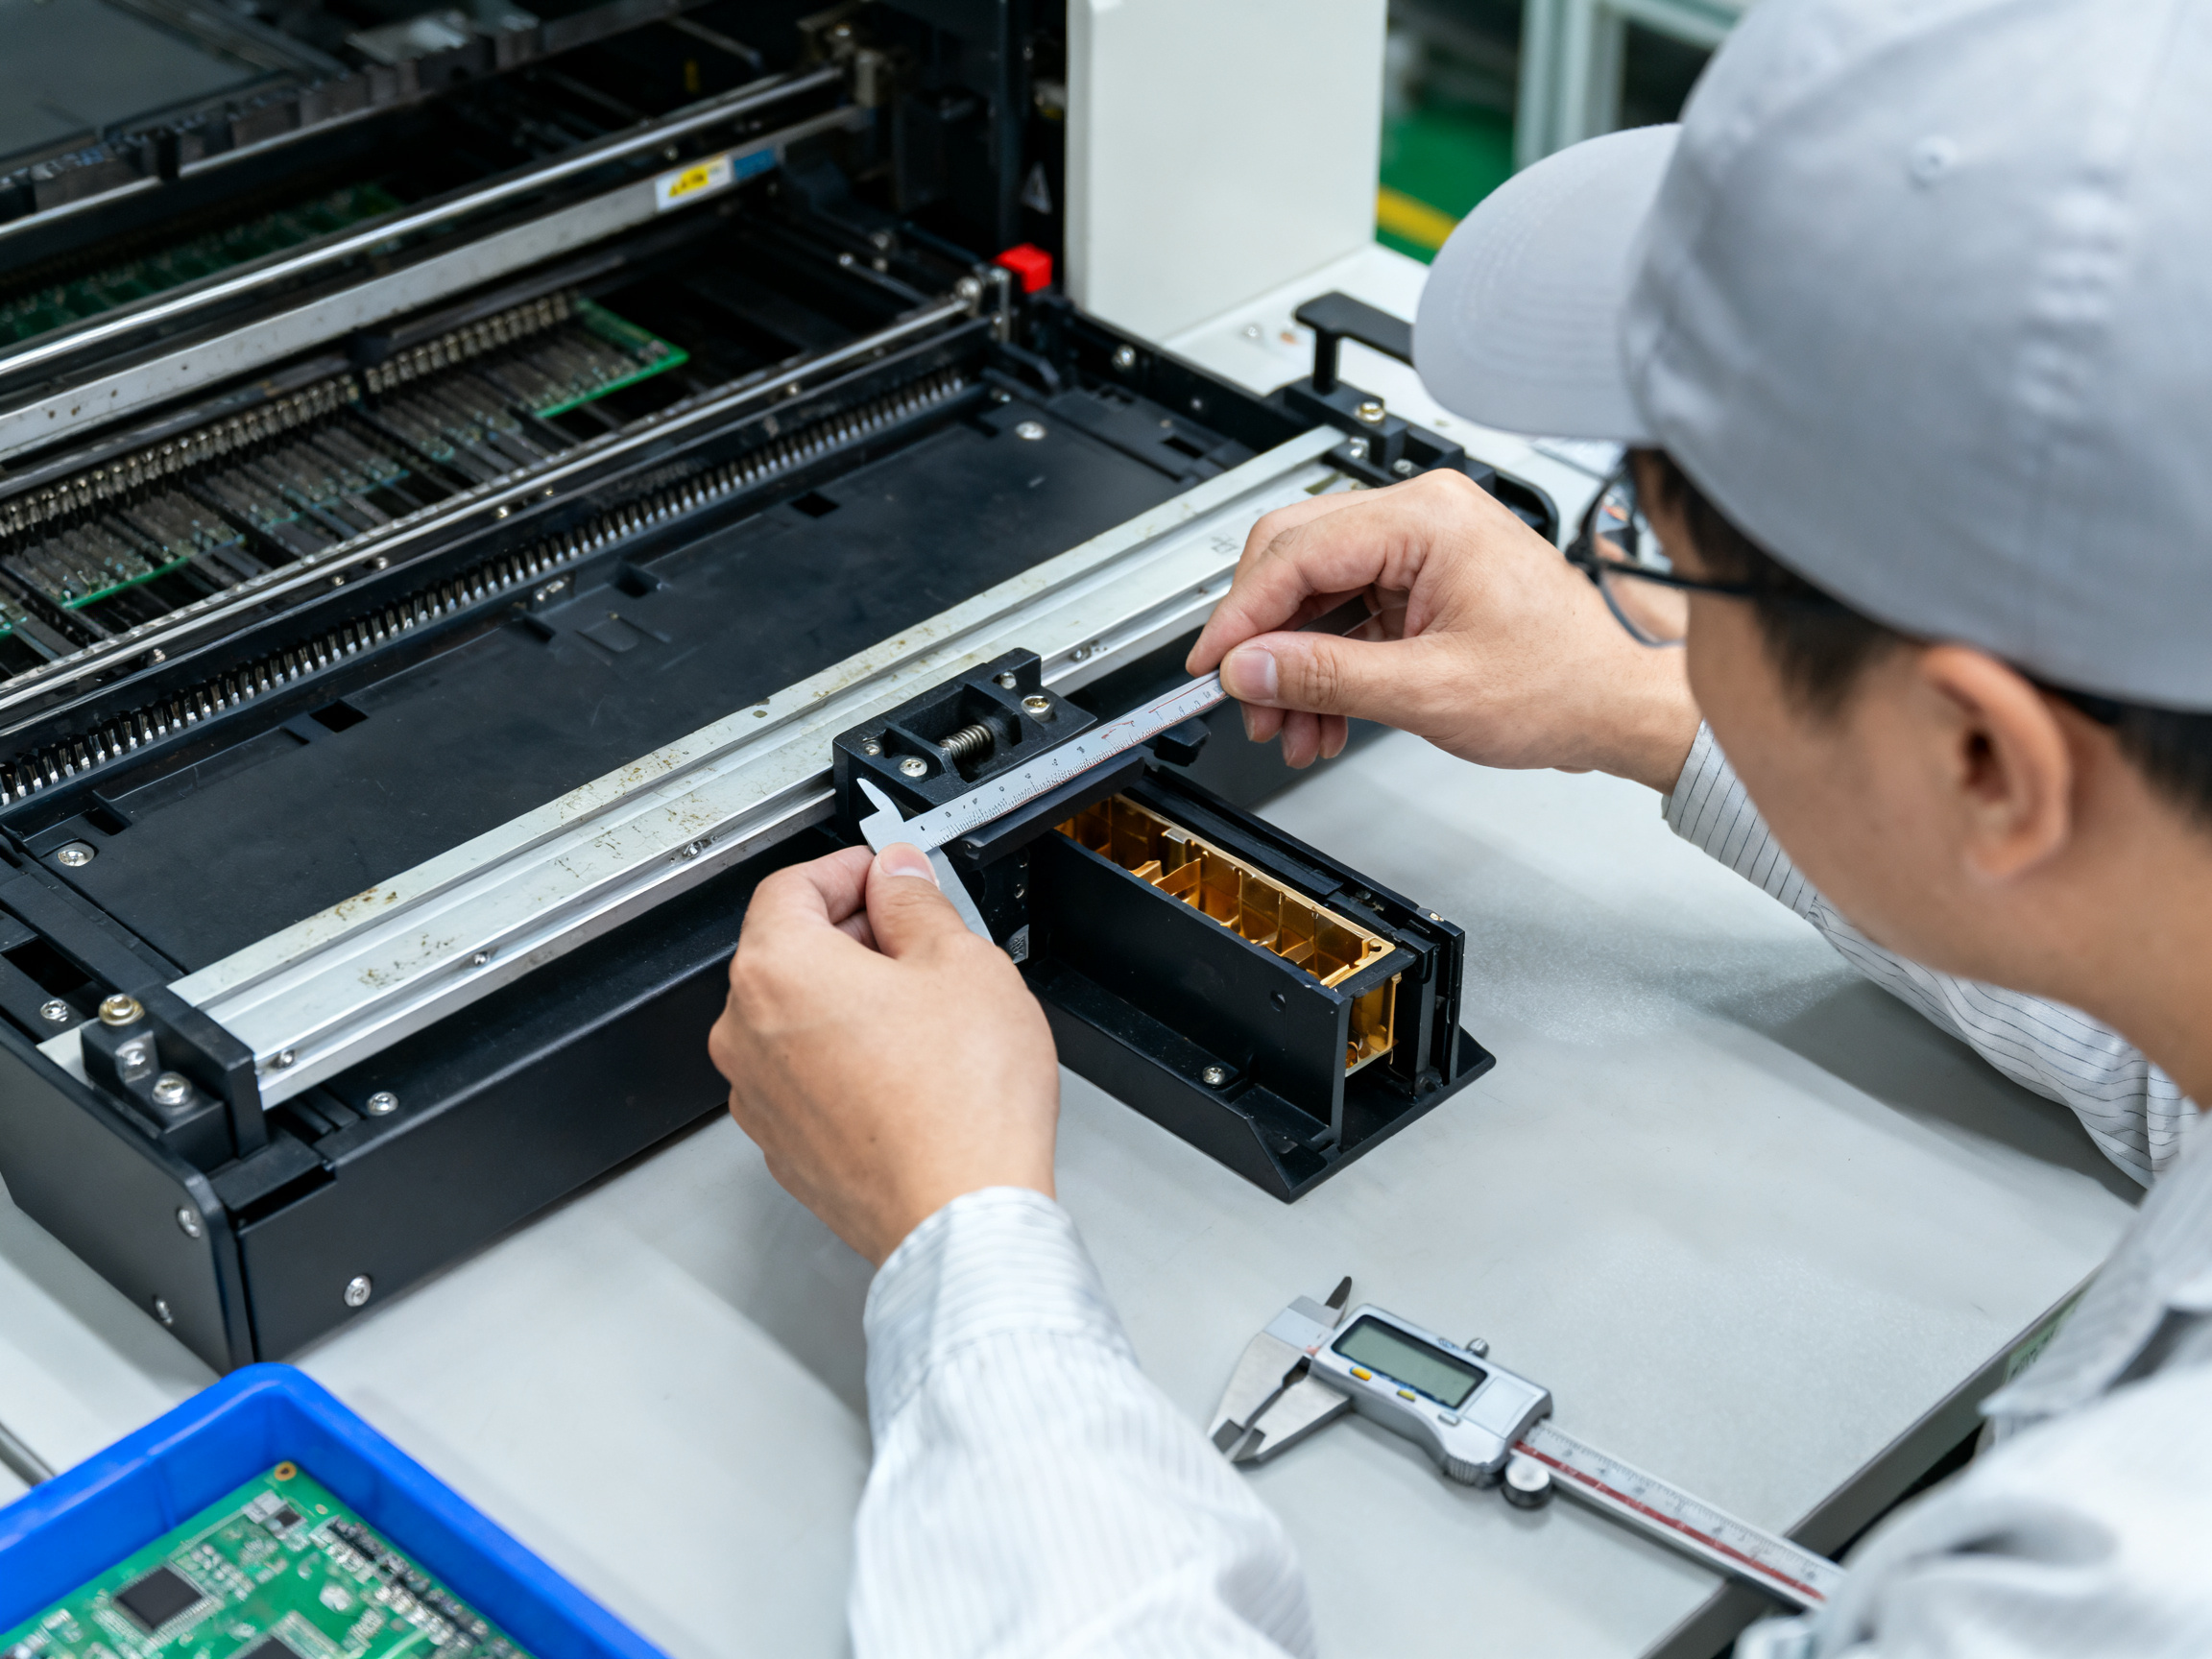
A practical pcb loader troubleshooting kit for jams, skew, and misfeeds starts with the basics. You’ll want digital calipers for checking magazine slot dimensions, feeler gauges for measuring rail clearances, and a good set of hex keys in metric and imperial. Torque tools matter more than most people think because loose screws on pusher assemblies cause all kinds of weird faults that look electrical but aren’t.
I keep alignment rulers, cleaning supplies (isopropyl alcohol and lint-free swabs are non-negotiable), and compressed air in my kit. For spare parts, stock replacement sensors, belts, and rollers. You’ll also need anti-static tools because modern loaders have sensitive electronics everywhere.
When a jam happens, work through your mechanical inspection in order. Check magazine slots for wear and debris. Verify pusher travel with a ruler. Inspect the lift mechanism for smooth operation. Look at conveyor belts for cracking or glazing. Examine guide rails for burrs or misalignment. Test pneumatic cylinders for proper extension and retraction.
One thing I learned the hard way: always power down before reaching into any mechanism. A loader pusher doesn’t care about your fingers.
Track what you use and replace. Belts usually need changing every 3-6 months depending on volume. Sensors can fail without warning, so having spares on hand beats waiting for a courier during a production run.## 4. Follow a Step-by-Step PCB Loader Troubleshooting Guide or PDF
If you’re running a mixed SMT line with legacy equipment from the 2010s sitting next to newer loaders from 2024 and 2025, you need a standardized troubleshooting sequence that works across all of it. That’s where a solid pcb loader troubleshooting guide becomes invaluable.
The sequence we use goes like this. First, confirm the exact symptom from the HMI and check error logs (remember what we covered in section 1). Second, isolate whether it’s electrical or mechanical by checking sensor states first. Third, inspect the board and magazine for damage or contamination. Fourth, test the handshakes with upstream and downstream equipment. Fifth, run a slow-cycle test while watching IO status. Sixth, document everything you did and why.
A good troubleshooting PDF should include model-specific diagrams, an alarm-code table that maps codes to causes, maintenance interval schedules, safety warnings, spare-part references, and clear escalation criteria for when to call support.
| Guide Element | Generic Guide | Model-Specific Guide |
|————–|—————|———————|
| Diagrams | Generic illustrations | Your actual machine photos |
| Alarm codes | Common industry codes | Your specific alarm numbers |
| Maintenance | General intervals | Your OEM schedule |
| Spare parts | Universal recommendations | Exact part numbers |
| Time to diagnosis | Longer | Shorter |
Model-specific guides beat generic ones every time when you’re actually debugging a loader at 2am. The generic stuff is great for training, but when something breaks mid-shift, you want the guide that matches your machine.
Look for loader jam solutions documentation that includes a clear fault-isolation flowchart. This visual tool helps technicians decide between electrical and mechanical paths without guessing.
5. Build a Loader Jam Solutions Checklist for High-Volume SMT Lines
Here’s what I see happening way too often. A tech clears a jam, the line runs for 20 minutes, and then stops again. Same alarm. Same spot. They clear it again. Same result. What they didn’t do was figure out WHY the jam kept happening.
Loader jams are almost never caused by a single thing. They’re a system problem that involves your PCB dimensions, magazine condition, rail width, conveyor speed, upstream/downstream handshake timing, and board flatness all working together. When one of these breaks down, the whole chain reacts.
From Our Experience: Recurring loader jams often trace back to board warpage, magazine wear, rail-width drift, or upstream/downstream handshake timing rather than a single failed part. Treating each jam as isolated makes the problem permanent.
The key is building a loader jam solutions checklist that separates quick fixes from root-cause actions.
Root-Cause Jam Location Matrix
| Jam Location | Symptom | Likely Cause | Corrective Action |
|————–|———|————–|——————-|
| Magazine entry | Board won’t load into rail | Worn guide rails, wrong width setting | Measure slot width, replace rails if needed |
| Pusher transfer | Board stalls mid-push | Pusher misalignment, sensor fault | Check pusher home position, verify sensor LED |
| Rail mid-section | Intermittent stops | Rail debris, belt wear, motor issue | Clean rails, inspect belt tension |
| Rail exit | Board not reaching downstream | Conveyor speed mismatch, alignment | Sync speed with downstream, check rail alignment |
| Offload area | Board won’t drop into magazine | Warpage, offload sensor dirty | Verify board flatness, clean offload sensor |
Why High-Density Assemblies Need Extra Attention
If you’re running BGA or QFN components, you already know these parts are sensitive to handling stress. What you might not think about is how a jammed loader affects these assemblies downstream.
When a board with BGA components gets stopped suddenly in a loader, the mechanical shock can shift the package slightly. Not enough to see. But enough to cause a solder joint issue you won’t find until test. We always verify board flatness after any jam event involving high-value assemblies, especially if the jam happened near a placement machine.
Build your jam checklist around these categories: sensor checks, mechanical inspection, board condition, magazine condition, and line handshake timing. When every tech on your shift uses the same checklist, patterns become visible faster and root causes stay fixed.
Keep a jam log with timestamps, board type, and what was done to clear it. After a few weeks, you’ll see which issues are recurring and which ones were one-off events. That data is gold for your next preventive maintenance review.## 6. Check SMEMA, Hermes, and Line Communication Handshakes
Here’s something that trips up a lot of SMT techs. You fix the loader mechanically, run a solo test, everything works fine. Then you reconnect it to the line and it immediately throws a communication error with the screen printer. Classic handshake problem.
Most loader faults people chase mechanically actually start with a communication mismatch. When your loader talks to a screen printer, conveyor, or AOI system, they exchange signals for board available, machine ready, pass/fail status, and transfer timing. If one of these signals gets lost or mistimed, the whole line stops even when nothing’s mechanically wrong.
In 2026, Hermes (IPC-HERMES-9852) is the current standard for machine-to-machine communication. It uses TCP/IP and XML-based messages for identifiers, dimensions, and timestamped handover events. SMEMA (IPC-SMEMA-9851) is the older legacy standard that still works for compatibility mode. The tricky part comes when you’re mixing these protocols.
| Symptom | Mechanical Jam | Communication Fault |
|———|—————|———————|
| Line stop behavior | Stops immediately at jam point | Stops after timeout waiting for handshake |
| HMI display | Shows jam alarm with location | Shows comm error or timeout code |
| Test result | Solo test passes, line test fails | Both solo and line tests fail |
| Error pattern | Same location every time | Random stops at different points |
The biggest compatibility headaches happen in factories upgrading legacy equipment. A loader from 2018 running SMEMA might not play nice with a 2024 Hermes conveyor. That’s when handshake timing gets weird and faults look mechanical but aren’t. Check your HMI for handshake status. If the loader shows “waiting for machine ready” but the downstream machine thinks it’s ready, you’ve got a protocol mismatch to debug first.## 7. Use Preventive Maintenance Guides and Checklists to Reduce Repeat Faults
Here’s the honest truth about repeat loader faults: most of them are preventable. When the same jam keeps happening at the same spot, it’s usually because nobody documented what they found the last time, and the next tech started from scratch.
A solid preventive maintenance guide changes that whole dynamic.
Preventive maintenance standardizes the stuff that keeps your loader running. We’re talking cleaning schedules for sensor lenses, lubrication intervals for pusher mechanisms, belt tension checks every quarter, regular sensor alignment verification, pneumatic system inspections, and magazine slot audits to catch wear before it causes problems.
For high-volume lines, I break it down by frequency. Daily checks should cover visual inspection, debris removal from rails, and air pressure verification. Weekly means cleaning rails and guides, checking for abnormal noise, and verifying lubrication. Monthly gets into calibration verification and accuracy checks. Quarterly is where you do deep inspections on belts, rollers, and sensors. Annual reviews should include full mechanical alignment and life-limited part replacement.
This directly affects your procurement decisions too. When you track which parts fail most often, you know exactly what to stock in your spare-part kit. You can make smarter calls about maintenance software that logs these intervals automatically. And technician training becomes focused instead of generic.
| Frequency | Tasks | Who |
|———–|——-|—–|
| Daily | Visual check, rail cleaning, air pressure | Operator |
| Weekly | Clean and lubricate, noise inspection | Technician |
| Monthly | Calibration, accuracy verification | Technician |
| Quarterly | Deep wear inspection, belt check | Senior tech |
| Annual | Full alignment, part replacement | Specialist |
Keeping that PM schedule isn’t glamorous work. But it beats explaining to your production manager why the same jam shut down the line for the third time this month.## 8. Choose Training Courses and Troubleshooting Books for Technician Skill Gaps
Here’s a scenario I see all the time. You’ve got three shifts running the same loader, but one team always takes twice as long to clear jams. Why? Nobody trained them on your specific machine. They learned on a different model, or learned from whoever was there before them, and that knowledge was half-baked to begin with.
When you notice repeated operator errors, inconsistent fault isolation across shifts, poor documentation of what works, or just too much dependence on one or two people who “know the machine,” that’s when training makes more sense than buying another tool.
When a Course Beats a Guide
Courses work best when you need behavior change across a team. Guides are great for reference. Courses change how people think about problems. If your techs keep making the same mistakes despite having good documentation, the gap is skill, not information.
In 2026, you’ve got several training options worth considering:
-
Vendor-specific courses: Mycronic, Yamaha, and Kurtz Ersa offer equipment-focused training that gets your team actually working on your machines 1. Expect to pay $2,000 to $8,000 per day for onsite training, or less for online modules.
-
IPC certification programs: These build broader credentials that transfer across equipment types. Good for career development and establishing baseline competency 2.
-
Automation and PLC troubleshooting courses: TPC Training and similar providers cover the electrical and controls side that most SMT techs struggle with 3.
-
Internal SOPs: Your own documentation of how YOUR line works. Nothing beats this for consistency, but it takes time to build right.
The best pcb loader troubleshooting book in the world won’t save you if it’s written for a different machine. Model-specific documentation from your OEM usually beats generic textbooks, but structured courses fill the gaps that any written material leaves behind.
Skills to Validate During Onboarding
When new technicians start, verify these skills before they touch your line:
- Reading HMI error codes and navigating diagnostic screens
- Following lockout/tagout procedures without shortcuts
- Identifying sensor types and verifying sensor operation
- Understanding SMEMA or Hermes handshake signals
- Documenting fault findings in your maintenance system
Training is an investment. But so is losing an hour to a jam that a trained tech would clear in fifteen minutes.## 9. Compare Troubleshooting Software, Guides, Kits, and Courses Before Buying
Here’s where procurement decisions get interesting. You’re staring at a list of options, trying to figure out what actually makes sense for your line. The answer isn’t the same for everyone, and that’s the part nobody tells you upfront.
Your buying decision should start with five questions. How often does your loader fail? Older equipment from the 2010s behaves differently than 2024 models. How skilled is your in-house team? Some techs need step-by-step guides, others just need reference materials. How complex is your line integration? More equipment means more handshake debugging. What’s your production volume risk? A line running 24/7 needs faster diagnostic tools than a low-volume operation. And finally, how quickly do you need results? Software gets you answers fast but costs more upfront.
Resource Comparison Matrix
| Resource Type | Best Use Case | Speed | Cost | Long-Term Value |
|————–|————–|——-|——|—————–|
| Software diagnostics | Frequent faults, new equipment | Fast | Higher | High for high-volume lines |
| Troubleshooting kit | Mechanical issues, floor work | Medium | One-time | High for hands-on techs |
| Model-specific PDF | Legacy equipment, reference | Slow | Low | Medium |
| Third-party courses | Skill gaps, team training | Slow | Medium | High for retention |
| Vendor service support | Complex faults, escalation | Fast | Highest | Low unless used often |
Matching Resources to Your Situation
Pro Insight: Production managers should match troubleshooting resources to line maturity. Mature lines (2024+) benefit most from software and preventive maintenance. Legacy lines (2010s) need vendor manuals and hands-on kits. Mixed lines need both.
The truth is, most SMT operations need a combination. Software diagnostics and preventive maintenance guides cover day-to-day needs. A solid troubleshooting kit handles what software cannot. Training courses build team capability over time.
When you search for “best loader jam solutions LLC” or “best loader jam solutions inc,” you’re probably looking for service vendors. That’s fine, but verify their SMT equipment experience before signing anything. Anyone can claim to fix loaders. You want someone who knows your specific machine.
Here’s my take. Start with what your data tells you. If sensor faults dominate your error logs, invest in software diagnostics. If mechanical jams are your problem, build a better kit. If your techs can’t interpret what they’re seeing, send them to a course.
The right investment depends on your specific pain points. No single solution covers everything, but a layered approach usually wins.## 10. Know When Troubleshooting Is Not Enough and Equipment Upgrade Is Required
Sometimes, no matter how good your troubleshooting kit is or how well-trained your team gets, the real problem is that your equipment simply can’t keep up anymore. Old loaders from the 2010s have real limitations that maintenance cannot fix.
Here are signs you need to upgrade instead of repair:
Obsolete controls are a major red flag. If your loader runs on a PLC platform nobody manufactures anymore and spare parts take weeks to source, you are one breakdown away from a full line stop. Poor spare-part availability means you spend more time hunting for components than actually running production. Incompatible line protocols become a bigger problem as you upgrade other equipment. A loader that only speaks SMEMA might hold back a line you have upgraded to Hermes. Unstable handling for thinner boards limits what you can run.
When you are paying around $75,000 per hour in downtime costs, these equipment gaps start looking expensive fast. Before proposing an upgrade, track your fault history for at least three months. Document recurring downtime hours, repair costs, scrap rates, and what you are losing in throughput. An ROI comparison helps make the case to management.
| Cost Factor | Current Loader | Upgrade Option |
|————|—————|—————-|
| Recurring downtime (annual) | $X | $Y |
| Repair parts and labor | $X | $Y |
| Scrap and rework | $X | $Y |
| Projected savings | – | $Z |
| Payback period | – | N months |
If the numbers support it and your fault history shows systemic equipment limits rather than maintenance gaps, a new loader makes sense. Sometimes the best troubleshooting decision is knowing when to stop troubleshooting.
Upgrade-Readiness Checklist
- [ ] Spare parts no longer available from OEM
- [ ] PLC or HMI platform discontinued
- [ ] Cannot handle boards thinner than 0.6mm
- [ ] SMEMA-only, incompatible with Hermes upgrades
- [ ] Fault history shows recurring pattern despite maintenance
- [ ] Downtime costs exceed upgrade ROI calculation
Comparison Table: Best PCB Loader Troubleshooting Resources by Use Case
Not sure what you need? Here’s a quick map showing what each resource type answers and who benefits most from it.
| Resource Type | Key Question It Answers | Recommended Users |
|————–|————————|——————-|
| Diagnostic software | Why is my loader throwing this specific error code? | Technicians, process engineers |
| Mechanical toolkit | What’s physically wrong and how do I fix it on the floor? | Maintenance techs, operators |
| Model-specific PDF/guide | How do I maintain this exact machine and interpret its alarms? | All line personnel |
| Training course | Why does one shift struggle while another clears jams fast? | Production managers, team leads |
| Preventive maintenance checklist | How do I stop the same jam from coming back next week? | Supervisors, quality leads |
| Vendor service contract | Who handles this when it’s beyond our skill level? | Operations heads, procurement |
| Equipment upgrade path | When does it make more sense to replace than repair? | Procurement managers, plant managers |
Use this table to match your current pain point to the right resource. If you’re still unclear after reading this whole guide, start with the diagnostic software column. That’s where most issues get solved fastest in 2026.## Conclusion: Expert Recommendations for Choosing the Right Troubleshooting Resource
Here’s what to do with everything you’ve just read. Start with your HMI error logs and PLC diagnostics because that data is free and it’s usually right. Check your sensors and cables before touching anything mechanical. Build out your troubleshooting kit if you haven’t already. Use a model-specific guide as your reference bible. Test line communication handshakes before assuming it’s a loader problem. And finally, lock in your preventive maintenance schedule so the same jams stop coming back.
The real next step is simple. Track your recurring faults for 30 days. Write down what happened, what you fixed, and why it happened in the first place. Once you have that data, you can decide whether you need more training, better tools, or an equipment upgrade altogether.
Want a free PCB loader troubleshooting checklist customized for your line? Reach out and we can walk through your specific setup.