



Ngày đăng: 24 July 2026
Last Updated: 24 July 2026
Thời gian đọc: 10 minutes
This guide covers everything you need to know about cutting, joining, connecting, making, and cleaning rubber conveyor belts in your SMT production environment.
Introduction: Why Belt Cutting, Joining, and Maintenance Quality Matters
You know that sinking feeling when a production line goes down? Maybe it’s a belt that started drifting to one side, or a splice that finally gave out after weeks of warning signs. Suddenly your “minor issue” becomes a $20,000 problem, easy.
Conveyor downtime costs add up faster than most people expect. Industry benchmarks put unplanned conveyor stoppages at $5,000 to $15,000 per hour in many manufacturing settings. In high-volume electronics assembly, where a single line might process thousands of units per shift, even brief belt failures can cascade into major production losses Questions Answered: 11 | Total Sources: 55.
The most common culprits? Tracking drift that wears belt edges ragged. Weak splices that separate under load. Contamination buildup that throws off alignment and causes product handling errors. Splice geometry mistakes that cause immediate mistracking after a repair. These issues show up everywhere from heavy material handling to precision SMT lines.
The thing is, most of these problems are preventable. Not always, but often. Better cut preparation, stronger joining techniques, smarter cleaning routines, and regular inspection cadence can mean the difference between a belt that runs reliably for years and one that causes repeated headaches.
This guide covers everything you need to know about cutting, joining, connecting, making, and cleaning rubber conveyor belts in your SMT production environment. We’ll walk through practical techniques, tool selection, splicing methods, maintenance schedules, and troubleshooting tips. The focus is on what actually matters for production efficiency, high-reliability operation, reduced waste, and stable performance in automated manufacturing.
Whether you’re replacing a worn belt on a lead-free reflow oven conveyor or setting up a new SMT line, the principles are the same: do the belt work right the first time, and your line will thank you.
By Jace Liu. [Author bio placeholder: Jace Liu is associated with Shenzhen Chuxin Electronic Equipment Co., Ltd., specializing in SMT equipment and conveyor maintenance content for electronics manufacturing operations. No specific credentials were provided in the input, so do not claim years of experience, certifications, employer history, or specific achievements until verified.]
Author Credibility: About Jace Liu
By Jace Liu. [Author bio placeholder: Add verified credentials, professional background, and relevant SMT equipment or conveyor maintenance expertise here before publication. No specific credentials were provided in the input, so do not claim years of experience, certifications, employer history, or specific achievements until verified. Jace Liu covers SMT equipment, conveyor belt maintenance, and electronics manufacturing operations for Shenzhen Chuxin Electronic Equipment Co., Ltd. Contact Chuxin to confirm author credentials before finalizing for E-E-A-T purposes.]
Understanding Rubber Conveyor Belts Before You Cut or Join Them
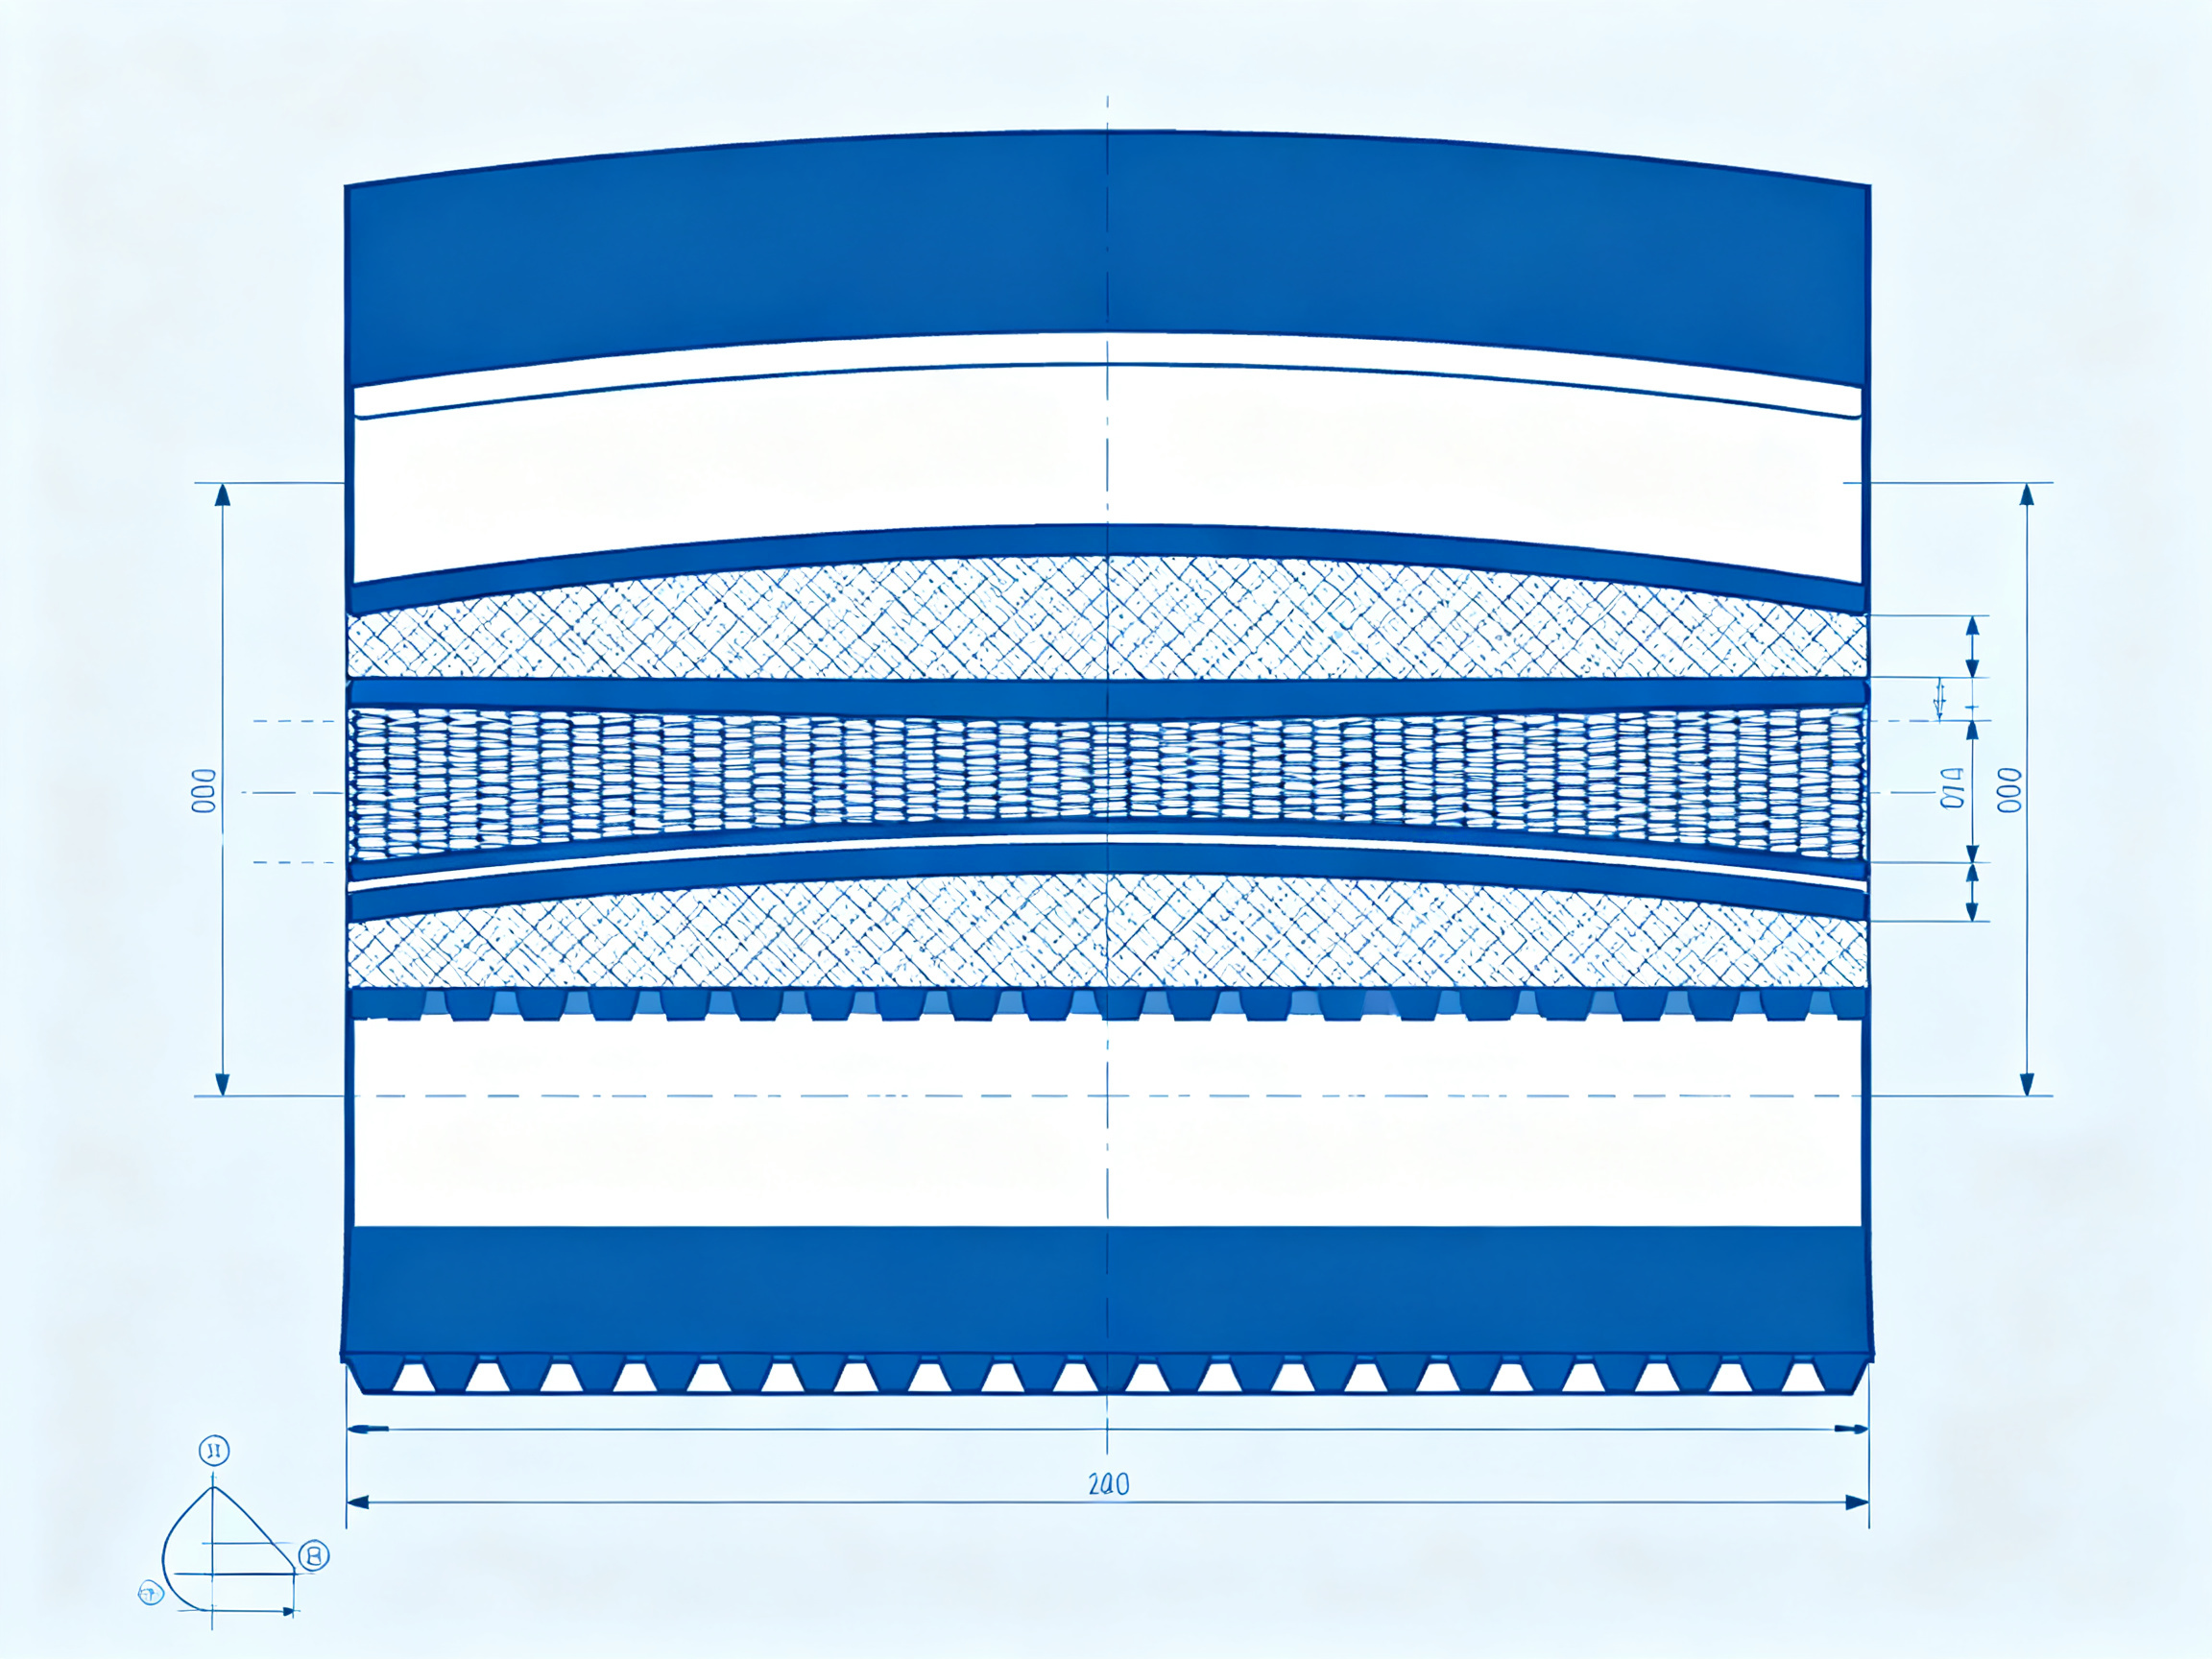
Before you grab a blade or a splice kit, it helps to know what you’re actually working with. A rubber conveyor belt isn’t just one piece of rubber. It’s built in layers, and each layer does something specific.
Belt Construction: The Layers and What They Do
Here’s the basic anatomy of a rubber conveyor belt, from top to bottom:
| Layer | What It Is | What It Does |
|——|———–|—————|
| Top Cover | The rubber surface you see | Protects the belt from wear, abrasion, and material impact |
| Carcass | Fabric plies or steel cords inside | Provides tensile strength and structural integrity |
| Bottom Cover | The underside that rides on pulleys | Protects against pulley friction and wear |
| Edge | Sealed or cut edge finish | Prevents delamination and water ingress |
The carcass is really the heart of the belt. For most SMT and electronics handling applications, you’ll see fabric-reinforced belts with polyester/nylon (EP) plies. These give you good flexibility without being too thick for precision transfer applications. Steel-reinforced belts are out there for heavy-duty mining and aggregate work, but they’re overkill for a cleanroom or assembly line.
How Rubber Belts Are Made
The short version of how rubber belts are made goes like this: raw rubber gets mixed with carbon black, oils, and curing chemicals. This compound gets rolled into thin sheets through a calendaring process. Then fabric plies get sandwiched between rubber layers. Finally, the whole assembly goes into a press and gets vulcanized (cured with heat and pressure). This step is what gives the belt its final strength and弹性.
The vulcanization process matters to you because it affects how well a splice will hold. If the belt was properly cured during manufacturing, the splice adhesive or hot vulcanized joint will bond better.
Belt Types and What They Mean for Maintenance
Not all rubber belts are the same. Here’s what you’ll typically encounter:
Lightweight fabric belts show up a lot in electronics handling. They’re flexible, run smoothly over small pulleys, and work well for precision indexing. The tradeoff is they’re more sensitive to tension and misalignment.
Heavy-duty rubber belts handle rough material and high loads. They resist abrasion and impacts better, but they’re stiffer and harder to splice cleanly.
Heat-resistant belts matter if your line runs through a reflow oven. Standard rubber can soften and delaminate under sustained high temperatures. Look for belts rated for your peak process temperature.
Oil-resistant belts are essential if you’re moving assemblies with cutting fluids or process oils. Standard natural rubber degrades quickly around petroleum-based liquids.
The main point: match your belt type to your environment. A belt that’s wrong for your application will cause problems no matter how good your splicing technique is.
Safety and Tooling: What to Prepare Before Cutting or Joining a Belt
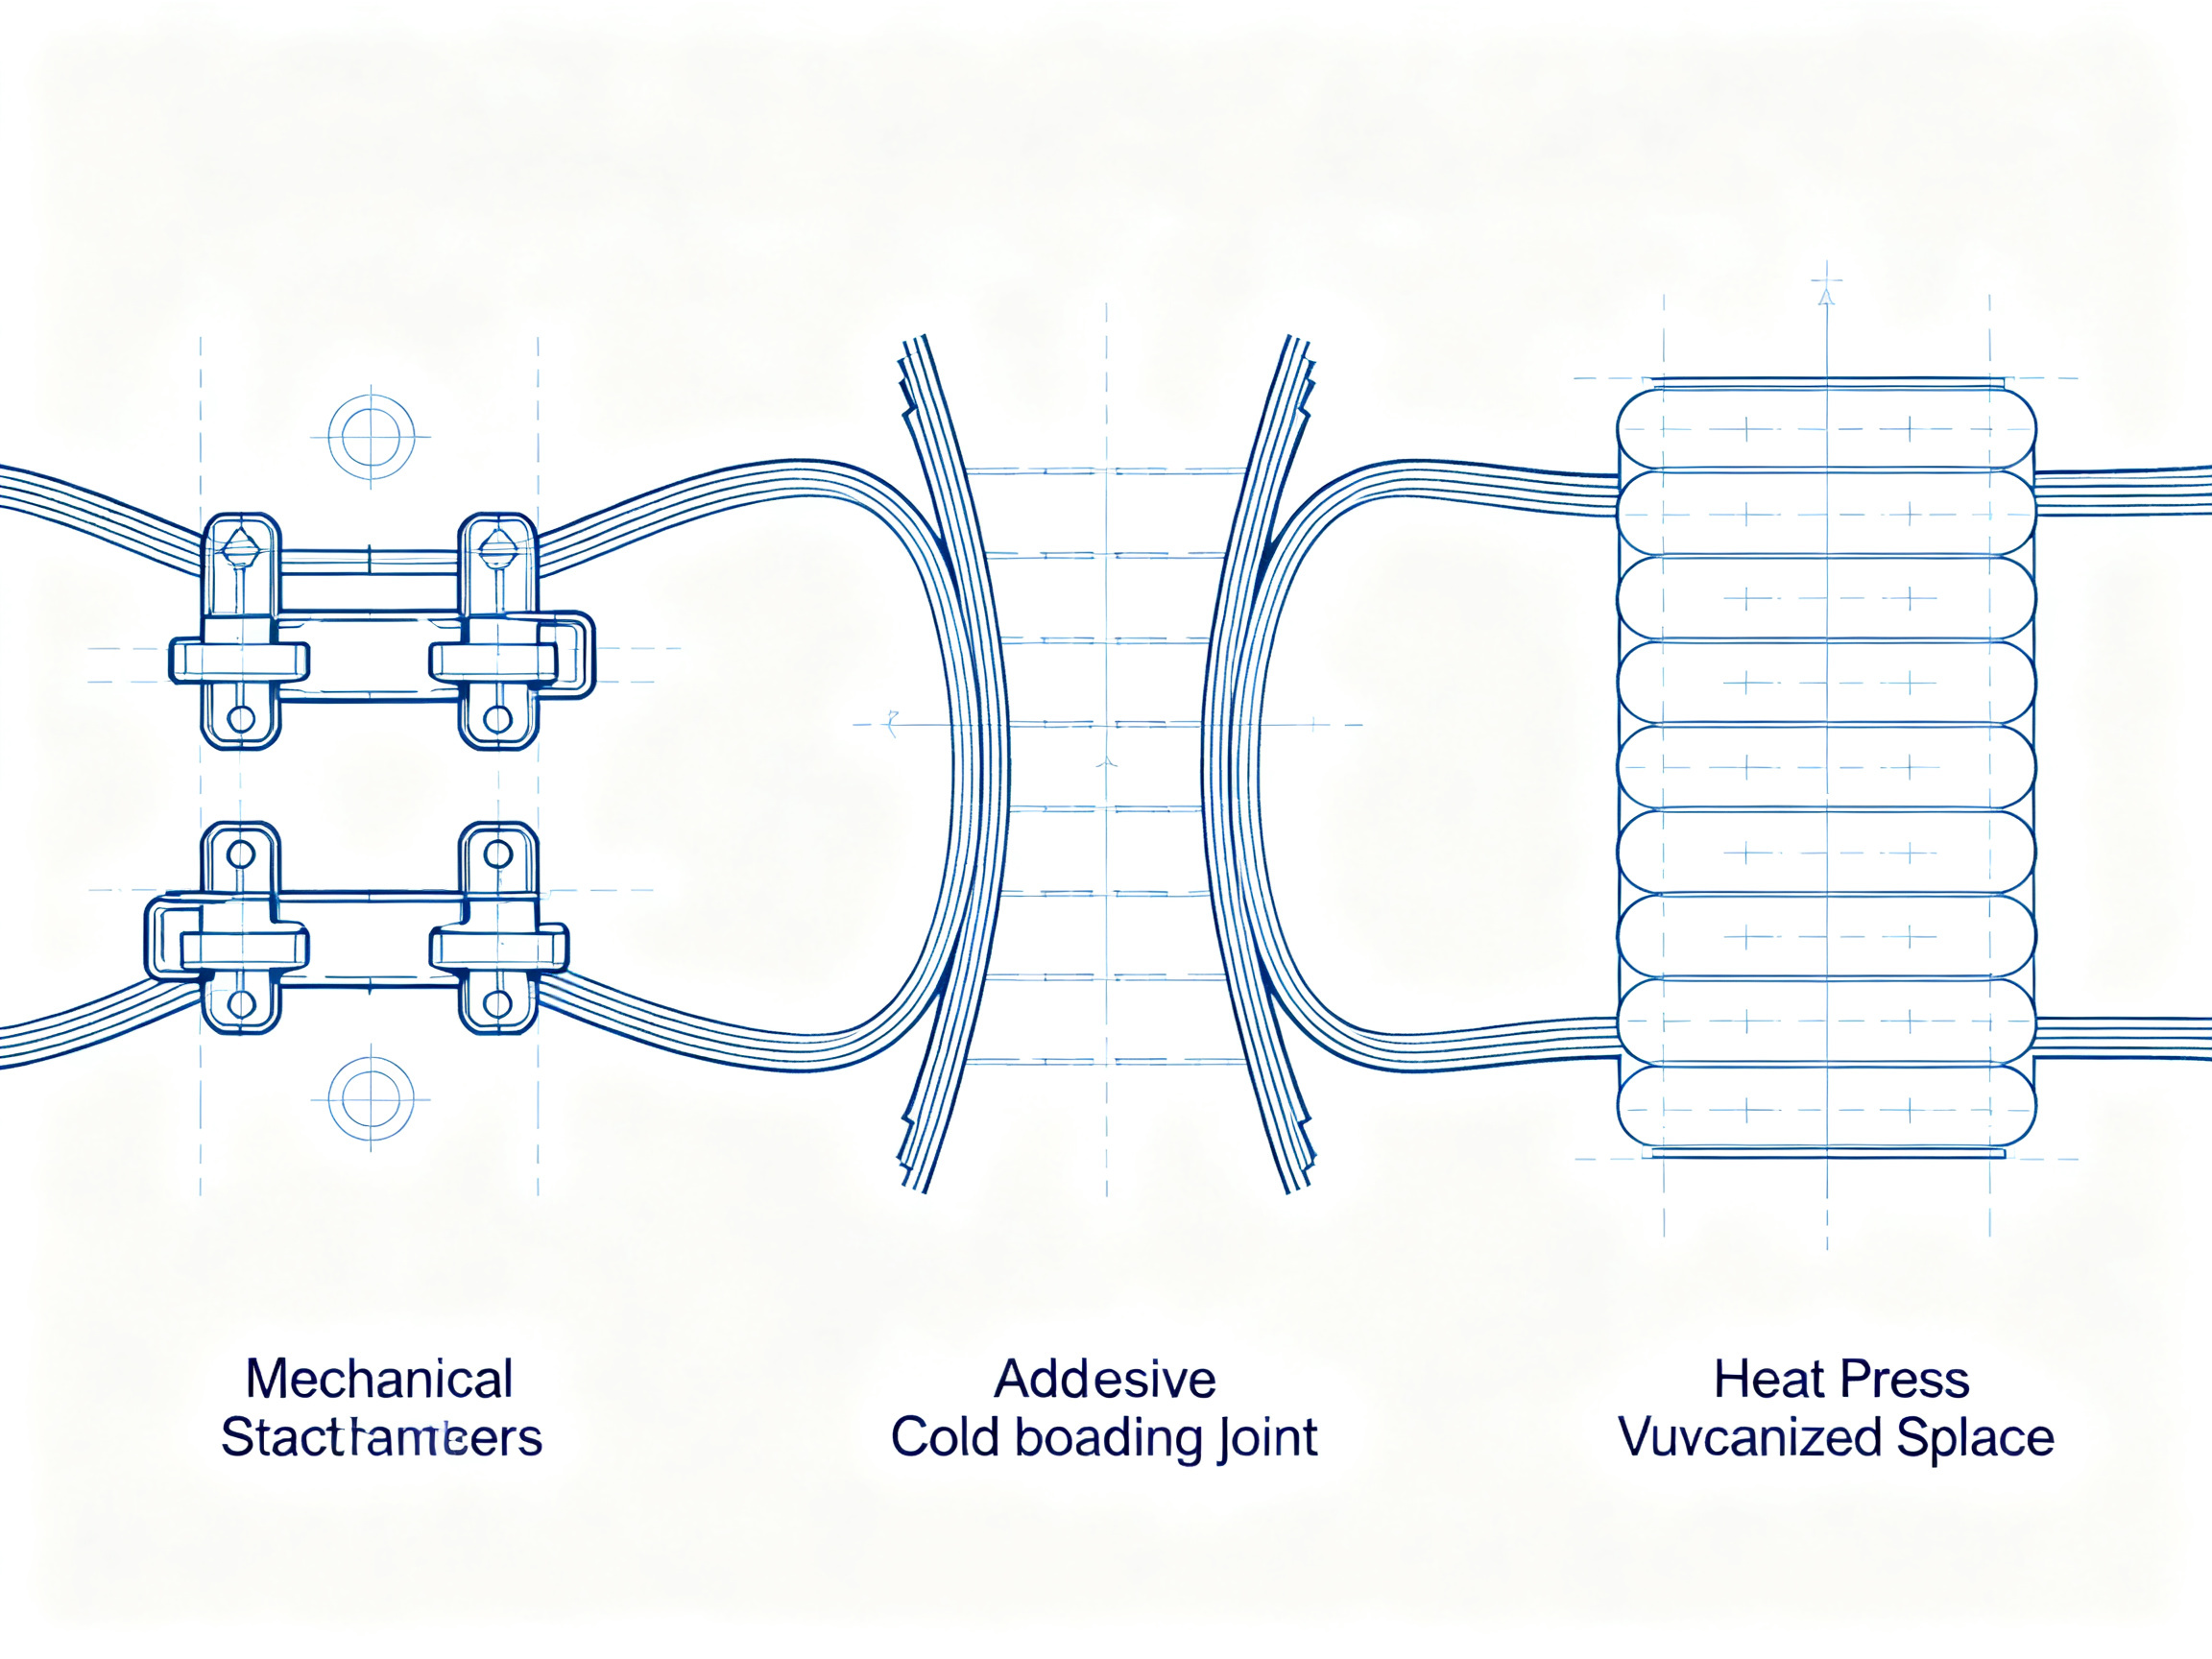
Before you touch a belt cutter or splice kit, you need to lock things down. Literally. Here’s what actually matters.
Safety first, always
Lockout/tagout is non-negotiable. OSHA 29 CFR 1910.147 requires you to isolate all hazardous energy before any maintenance work. That means powering down the conveyor, locking the disconnect switch, and verifying zero energy state before you do anything else.
Release all belt tension. A tensioned belt can snap back dangerously during removal or cutting. Engage the take-up mechanism fully, or block the belt ends if needed. Keep the work area clean and free of debris. And always check the equipment manual for your specific machine requirements.
Tools that actually work
Here’s what you need on hand:
| Task | Required Tools | Purpose | Safety Note |
|——|—————|———|————-|
| Measuring | Straightedge, square, chalk line, measuring tape | Ensure square, straight cuts | None |
| Cutting | Belt knife, hooked utility blade, powered cutter | Clean belt cuts | Watch for blade binding |
| Holding | Clamps | Secure belt during work | Check clamp condition |
| Splicing | Splice kit, skiver, fastener tools | Join belt ends | Follow kit instructions |
| Protection | PPE (gloves, safety glasses) | Personal safety | Mandatory |
| Bonding | Compatible adhesive or vulcanizing materials | Secure splice | Check compatibility |
Contamination control matters
In SMT environments, loose rubber debris, adhesive residue, and dust near sensitive assemblies can cause product handling errors and line stoppages. Vacuum or wipe surfaces clean before starting work. Keep metal shavings and oil away from belt surfaces and production areas.
Lời khuyên từ chuyên gia: Before starting any belt work, walk the line and note tracking patterns, edge wear, and any existing splice condition. Documenting the pre-job state helps you spot what caused the original problem and prevents repeat failures.
We always double-check our tool layout before powering anything back on. Call it habit, call it paranoia. Either way, it beats discovering a stray wrench in the belt path after startup.
How to Cut a Rubber Conveyor Belt Cleanly and Squarely
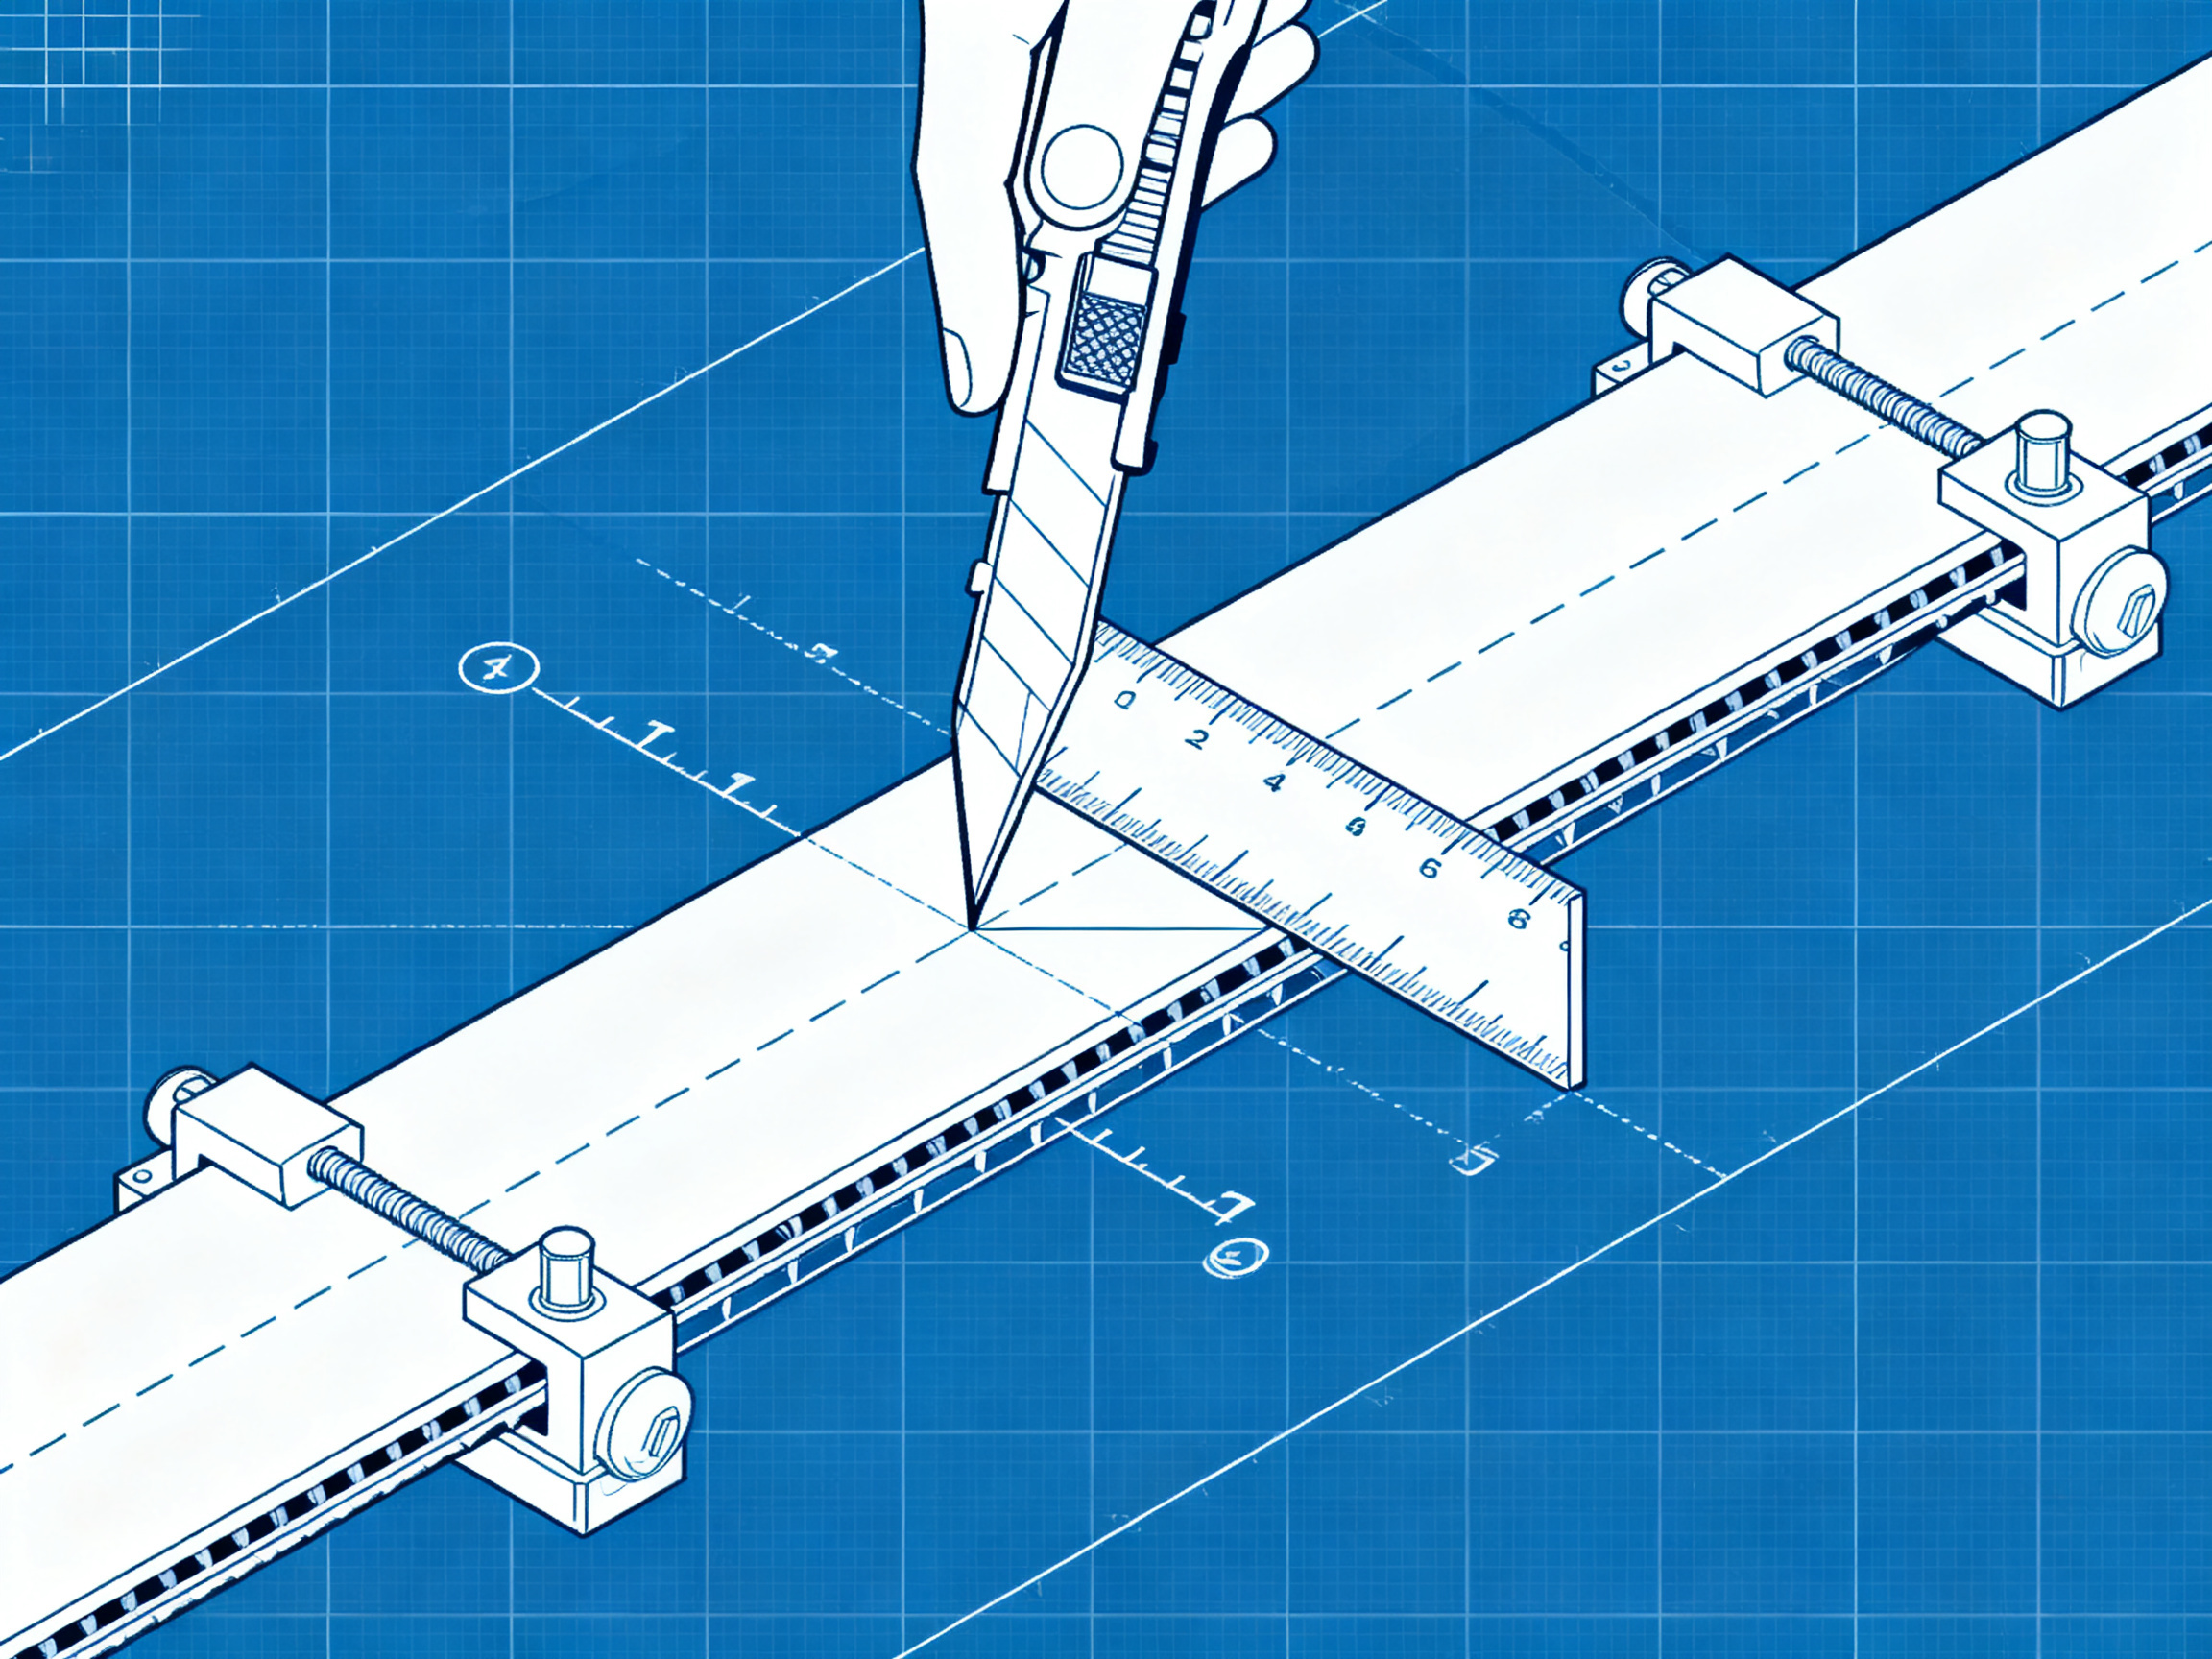
A crooked cut is basically a future tracking problem waiting to happen. The belt runs, the splice drifts, and suddenly you’re chasing the belt edge instead of running production. Sounds dramatic, but I’ve seen it happen enough times to know the first step to a good splice is a square cut.
Here’s the step-by-step process that works for most rubber fabric belts you’ll encounter on SMT lines:
Step 1: Isolate the equipment
Lock out the conveyor power. This isn’t optional, it’s mandatory for safety and prevents accidental startup while you’re measuring and cutting.
Step 2: Release belt tension
Engage the take-up mechanism fully to slacken the belt. A tensioned belt will fight you and ruin your cut line.
Step 3: Measure twice, mark once
Use a chalk line or straightedge to mark your cut line across the belt. For splices, you want the cut square to the belt axis. Measure at multiple points along the belt width to catch any irregularity. Mark both edges clearly.
Step 4: Clamp the belt securely
Clamp the belt to a stable work surface or the conveyor frame. It shouldn’t shift during cutting.
Step 5: Cut in controlled passes
Use your chosen cutting tool (see the breakdown below). Don’t try to slice through in one go. Light pressure, multiple passes gives you better control and a cleaner edge.
Step 6: Inspect the cut edge immediately
Check for squareness with a square. Look at the cover rubber, the carcass plies, and the bottom cover. Each layer should be clean and square.
Step 7: Remove all debris
Vacuum or wipe away rubber fragments, dust, and any debris. This stuff near a production line is a contamination risk.
Best Way to Cut Rubber Conveyor Belt by Type
| Belt Type | Recommended Tool | Why |
|———–|—————–|—–|
| Lightweight fabric belts (under 6mm) | Sharp utility knife or hooked belt knife | Fine control, minimal waste |
| Medium fabric belts (6-12mm) | Manual belt cutter | Consistent straight cuts, less effort |
| Heavy fabric or reinforced belts (over 12mm) | Powered belt cutter | Handles thickness without binding |
| Steel-cord belts | Specialist cutting tool or service vendor | Steel reinforcement requires proper equipment |
For SMT environments, most of your work will be lightweight to medium fabric belts. A quality hooked blade gives you the control you need for precise cuts without mangling the edge.
Quality Checks After Cutting
Before you move on to splicing or reinstalling, run through this checklist:
| Issue | What to Look For | Cause |
|——-|—————–|——-|
| Rough edges | Jagged or torn rubber at the cut line | Dull blade, too much pressure |
| Angled cut | Cut line not square to belt axis | Poor marking, belt shifted during cutting |
| Exposed reinforcement | Fabric plies or cords visible at edge | Undercutting during cutting |
| Jagged cover | Torn or compressed top cover rubber | Blade technique or wrong tool for thickness |
| Inconsistent width | Belt width varies along the cut | Measurement error, shifting during cut |
If you spot any of these issues, recut the belt. A bad cut leads to a bad splice, and a bad splice leads to downtime.
One more thing. After cutting, handle the belt ends carefully until you’re ready to splice. Folded or crushed edges compromise the splice geometry and weaken the joint.
How to Join or Connect a Rubber Conveyor Belt
So you need to connect two belt ends together. Maybe you cut the wrong length, maybe a section wore out and you replaced it. Either way, the joining method you pick matters more than most people realize.
Here’s the honest truth: the fastest method isn’t always the best one. Your choice depends on belt speed, load, pulley diameter, cleanliness requirements, and how much downtime you can afford. Let’s break it down.
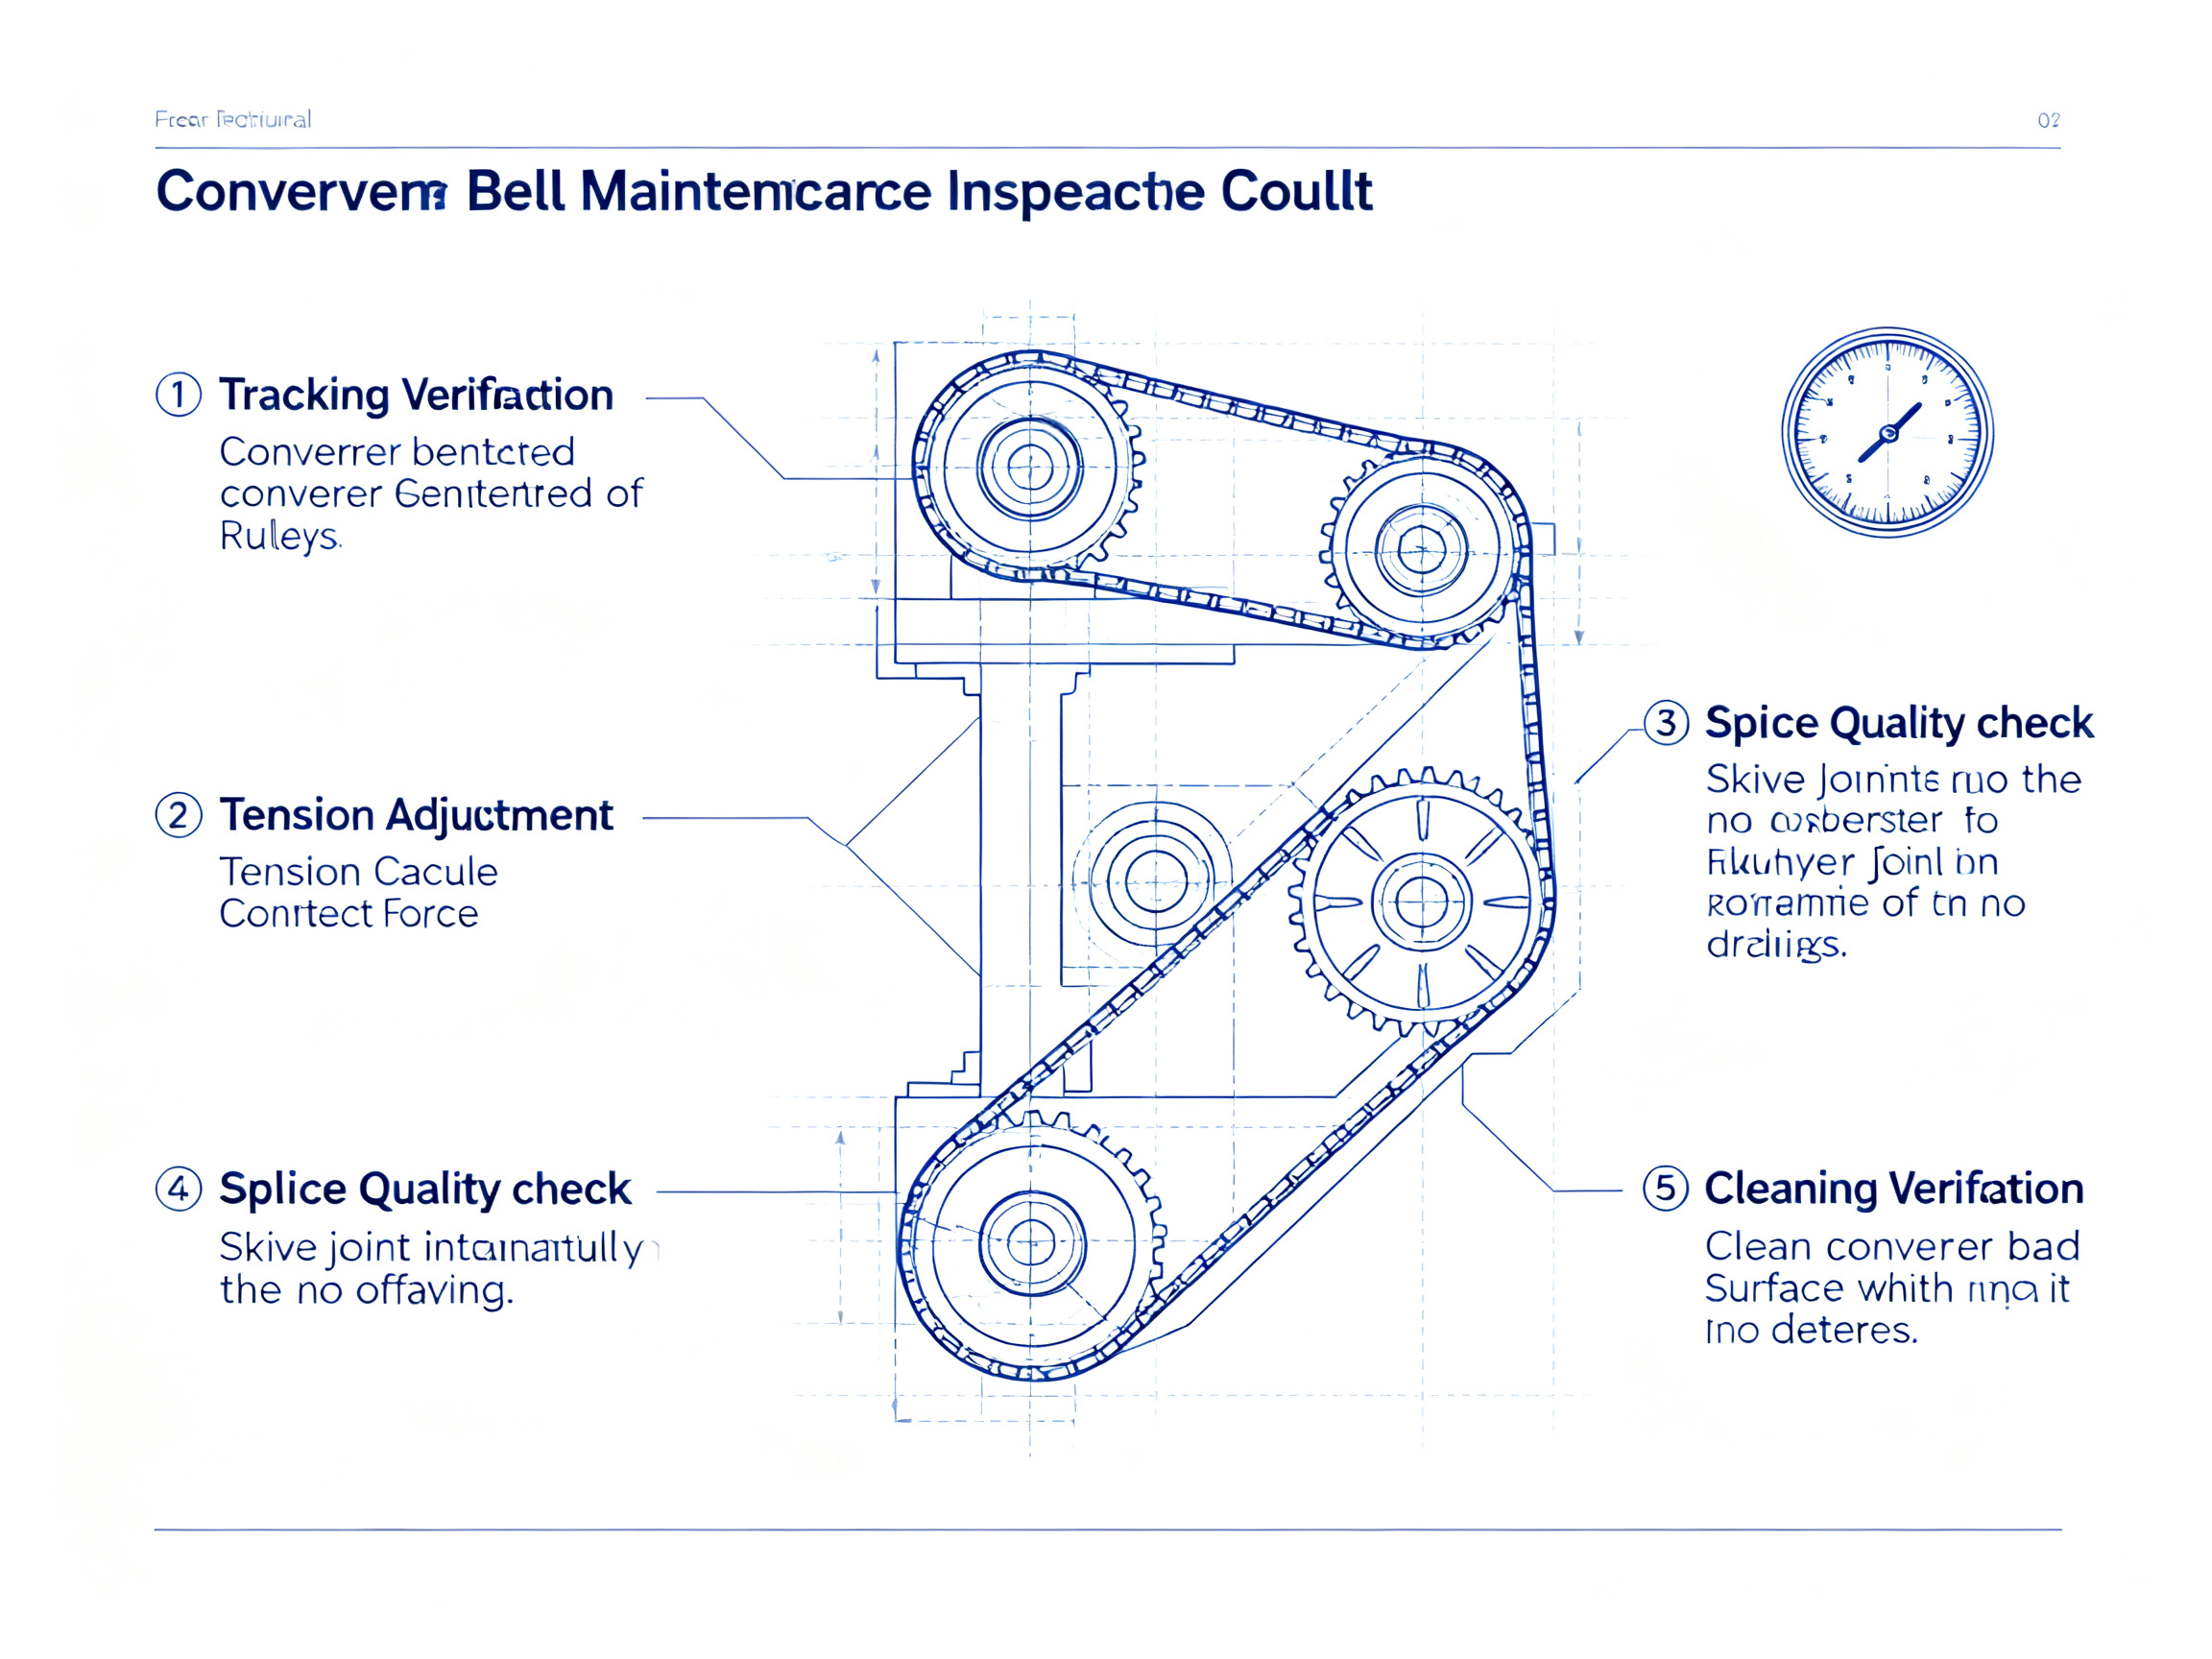
The Three Main Ways to Join a Rubber Conveyor Belt
Mechanical Fasteners
This is the quickest option. You punch holes in both belt ends and clamp them together with metal hinge-style fasteners. Think of it like a giant belt buckle.
Best for: Emergency repairs, field service, situations where you need the line running 10 minutes ago. Works fine for low-speed, low-tension applications.
Not ideal for: High-speed lines, precision SMT transfer, cleanroom environments, or anywhere metal parts might cause snagging problems.
Mechanical splices are weaker than vulcanized joints. They create stress points where the fasteners attach, and those metal clips can wear down pulleys and cleaners over time. But they’re fast, cheap, and you can do them with basic tools.
Cold Bonding (Cold Vulcanizing)
This method uses chemical adhesive to bond the belt ends together without heat. You apply adhesive to both surfaces, let it flash off, then press the ends together.
Best for: Clean environments, moderate-duty applications, situations where hot vulcanizing equipment isn’t available, belts that need to stay flexible.
Not ideal for: Heavy loads, high temperatures, or applications where cure quality is inconsistent.
Cold bonding is stronger than mechanical splicing but requires careful surface prep. Contamination kills the bond every single time. The adhesive cure depends on temperature and humidity too, so environmental conditions matter.
Hot Vulcanizing (Hot Splicing)
This is the premium option. You heat the belt ends under pressure with uncured rubber strips, and the heat cures everything into one continuous piece.
Best for: High-speed lines, heavy loads, critical applications where belt strength must match the rest of the system, long-term durability.
Not ideal for: Quick turnarounds, limited access situations, or when you don’t have the equipment and trained crew.
Hot vulcanized splices can reach 90-95% of original belt strength. Done right, they last as long as the belt itself. The tradeoff is setup time, specialized equipment, and skilled operators. You also lose more belt length per splice compared to other methods.
How to Connect Rubber Conveyor Belt Ends: The Practical Workflow
Once you’ve picked your method, here’s the process that works for all three approaches:
-
Square cut both belt ends — We covered this in the previous section, but it bears repeating. An out-of-square cut creates an out-of-square splice, and that leads to mistracking immediately after startup.
-
Prepare the belt ends — For mechanical fasteners, mark and punch the hole pattern. For bonding or vulcanizing, skive or roughen the surfaces that will contact each other. This step removes the cover rubber down to the carcass so the adhesive or uncured rubber can bond properly.
-
Clean everything — Solvent wipe the prepared surfaces. No dust, no oil, no contamination. This is where most splice failures start.
-
Align precisely — Clamp or hold the belt ends so they’re perfectly centered and aligned before you apply any fastener or adhesive.
-
Apply and cure — For mechanical: install the fasteners per manufacturer specs. For cold bonding: apply adhesive, let it flash, then press and clamp. For hot vulcanizing: position uncured strips, apply pressure and heat per the vulcanizer instructions.
-
Test under low load first — Run the belt at reduced speed before putting it back into production. Watch for tracking drift, unusual noise, or any sign the splice is pulling apart.
Which Method Should You Choose?
Here’s the quick comparison:
| Method | Best For | Not Ideal For | Downtime | Skill Level | Equipment Needed | Reliability |
|——–|———-|————–|———-|————-|——————|————-|
| Mechanical Fasteners | Emergency repairs, field work, low-speed lines | SMT lines, cleanrooms, high-speed applications | Low | Basic | Minimal | Moderate |
| Cold Bonding | Clean environments, moderate duty | Heavy loads, inconsistent conditions | Medium | Intermediate | Moderate | Good |
| Hot Vulcanizing | High-speed, heavy-duty, critical applications | Quick turnarounds, limited access | High | Advanced | Extensive | Excellent |
Nhận định chuyên sâu: For SMT and electronics manufacturing lines, cold bonding usually hits the sweet spot between reliability and practicality. Hot vulcanizing gives you the strongest splice, but the equipment setup time often isn’t worth it unless your line runs 24/7 with no maintenance window. Mechanical fasteners? Save those for actual emergencies.
One thing we see a lot is people picking mechanical fasteners because they’re fast, then dealing with repeat failures for months. The splice keeps failing, they replace it, it fails again. The root cause might be belt speed or pulley diameter exceeding what that fastener type can handle. Match the method to the application, not just the clock.
Also, check your pulley diameter against the fastener guidelines. Some mechanical fasteners require a minimum pulley size to flex around properly. Skip this check and you’ll wear out the hinge faster than expected.
How to Clean Rubber Conveyor Belts Without Damaging Them
Keeping your conveyor belt clean isn’t just about looks. In SMT production, dust, flux residue, and particulate buildup can throw off transfer reliability and cause product handling errors that cost you time and money.
Here’s the cleaning process that actually works for rubber belts in electronics manufacturing.
Step 1: Stop and isolate the equipment
Always lock out power before cleaning. This is mandatory for safety, and it prevents the belt from running while you’re working on it.
Step 2: Remove loose debris
Vacuum or wipe away loose particles first. Don’t brush dry. Brushing kicks dust into the air, and in a production environment, that stuff goes everywhere.
Step 3: Apply compatible cleaner
Use a mild detergent solution or a water-based rubber cleaner. Apply it to a lint-free wipe, not directly to the belt if overspray is a concern. Wipe in one direction to avoid spreading contamination.
Step 4: Rinse and dry
Follow with a clean damp wipe to remove residue. Then dry with a lint-free cloth. The belt must be completely dry before you restart the line.
Step 5: Inspect while cleaning
Look for wear, edge damage, or adhesive buildup during the cleaning process. This is when you’ll spot problems most easily.
Cleaning Compatibility by Contaminant Type
| Contaminant Type | Cleaning Approach | Cleaner Type | Notes |
|—————–|——————-|————–|——-|
| Dust and fine particles | Vacuum, then wipe | Water-based detergent | Avoid dry brushing |
| Flux residue (from nearby equipment) | Solvent spot clean | Isopropyl alcohol (verify compatibility) | Test on hidden area first |
| Packaging particles | Vacuum and wipe | Mild detergent | Check for static-generating materials |
| Light oils | Solvent wipe | Compatible rubber cleaner | Avoid petroleum on natural rubber |
| Adhesive residue | Spot treatment | Adhesive remover (verify compatibility) | Test before full application |
Dựa trên kinh nghiệm của chúng tôi: On precision SMT lines, we clean belts at shift change and do a quick visual check every 4 hours during production. Buildup that seems minor can cause surprising transfer errors, especially with smaller components. A dirty belt on a reflow oven conveyor can shift PCB positions just enough to cause alignment issues downstream.
What not to do:
Don’t soak belts unnecessarily. Rubber compounds degrade faster when saturated for long periods. Don’t use unapproved solvents. Chlorinated cleaners and mineral spirits can damage EPDM and natural rubber covers. Don’t scrape with metal tools. You’ll gouge the cover rubber and create more problems. Don’t pressure-wash near electrical components or bearings. And never restart before the belt is dry and tracked. A wet belt slipping on the drive pulley is a quick way to damage both.
When in doubt about a cleaning agent, test it on a small hidden section of the belt first. A compatibility issue is much easier to fix than a degraded belt cover.
Routine Maintenance After Cutting or Joining: Tracking, Tension, and Inspection
The work doesn’t stop once the splice is done. A perfect join that runs off-center is still a problem. Here’s what to check every single time you finish belt work.
Post-Service Checks: The Quick Verification Routine
Before you restart, run through this checklist:
-
Tracking observation: Run the belt at low speed first. Watch for drift toward either side. The belt should track centered on all pulleys.
-
Tension verification: Confirm tension is even on both sides. Uneven tension causes steering problems that look like alignment issues.
-
Splice alignment: Check that the splice sits square and centered. A crooked splice sends the belt sideways immediately.
-
Pulley condition: Inspect drive and idler pulleys for wear, damage, or buildup that could affect tracking.
-
Scraper and guide contact: Verify cleaning blades and side guides are touching properly without excessive pressure.
-
Roller transition: Confirm smooth belt entry and exit at all rollers. Binding or snagging indicates geometry problems.
We always mark the belt edge position on the frame after a repair. It’s a simple reference point that makes tracking drift obvious during the next shift.
Inspection Cadence for High-Volume Production
| Interval | Task | Purpose |
|———-|——|———|
| Each shift | Visual tracking check, edge wear inspection, debris survey | Catch problems early |
| Weekly | Idler rotation check, take-up position, buildup cleaning | Prevent cascade failures |
| Monthly | Splice inspection, pulley alignment verification, frame squareness | Deep maintenance |
| Quarterly | Instrumented alignment check, belt thickness measurement, lagging inspection | Planned downtime |
KPI Metrics for Production Managers
Track these to measure maintenance effectiveness:
- MTBF (Mean Time Between Failures): Target increasing over time
- MTTR (Mean Time to Repair): Target decreasing with better procedures
- Unplanned downtime hours per month: Should trend downward with preventive care
The payoff for consistent inspection? Fewer emergency repairs, lower overtime costs, and production lines that run when they’re supposed to run. Plus, you catch splice problems before they turn into product damage.
Troubleshooting: Common Conveyor Belt Problems After Cutting or Joining
So you finished the splice, fired up the line, and something is still off. It happens more than you’d think. Here’s what shows up most after belt work, and what actually helps.
Belt wandering
The belt drifts to one side no matter what you do. Usually caused by a cut that wasn’t square, a crooked splice, or misaligned pulleys. Check the splice geometry first. Measure across both ends of the splice. Pulley alignment comes next. Grab a straightedge and verify the drive pulley sits square to the belt path.
Splice lifting
A clicking noise or uneven feel points to bond failure. Could be contamination during assembly, incomplete curing if you vulcanized, or insufficient pressure during bonding. A lifting splice gets worse fast. Cut it out and redo it.
Fastener pull-out
Mechanical splices sometimes let go at the hinge points. This usually means fasteners are undersized for the belt tension, or the pulley is too small for that fastener style. Replace with the correct fasteners. Running a failing mechanical splice causes more damage downstream.
Belt slipping
The drive pulley turns but the belt lags. Check the take-up position and cleaner contact. Belt slipping causes overheating and splice damage fast. Tension properly or clean the drive surface.
Premature edge wear
Edges wearing faster means constant side rubbing. Check guides and see if the belt is truly centered. Misaligned edges shred quickly and create debris that gums up rollers.
Abnormal noise
Grinding, squealing, or clicking have different causes. Squealing usually means slipping or bearing issues. Grinding often points to debris. Clicking typically signals fastener problems or debris in a splice gap.
Quick Diagnostic Table
| Symptom | Likely Cause | Immediate Check | Corrective Action | When to Escalate |
|———|————-|—————–|——————-|——————|
| Belt wandering | Crooked splice, misaligned pulleys | Measure splice squareness, check pulley alignment | Square the splice, realign pulleys | If frame is bent |
| Splice lifting | Bond failure, contamination, undercure | Visual inspection of splice edges | Cut out and redo splice | If re-splicing doesn’t work |
| Fastener pull-out | Wrong fastener size, small pulley | Measure pulley vs fastener rating | Replace with correct fasteners | If fastener type is wrong for application |
| Belt slipping | Low tension, contamination | Check take-up position, cleaner condition | Increase tension, clean pulleys | If tensioning system is faulty |
| Edge wear | Side rubbing, bad guides | Watch tracking during operation | Adjust guides, correct tracking | If belt edge is already damaged |
| Abnormal noise | Bearing failure, debris, fastener issue | Locate source of sound | Service bearings, remove debris | If bearings need replacement |
When to Call for Backup
Some situations need professional help. Call your belt supplier, OEM, or maintenance specialist when dealing with steel-cord belts needing specialized splicing equipment, high-temperature belts with special compounds, safety-critical lines where failure isn’t an option, or regulated environments requiring documented repair procedures.
We always call for help when we’re not 100% sure. That “maybe it’ll work” repair has a way of failing at the worst time, like Friday afternoon before a big shipment.
Practical Buying and Specification Notes for Replacement Rubber Conveyor Belts
Before you order a replacement belt, take 10 minutes to write down what you actually need. This saves weeks of back-and-forth with suppliers and prevents the wrong belt from showing up.
What to Record Before Ordering
Here’s what your procurement team needs to have locked down:
| Specification | What to Measure or State |
|—————|————————–|
| Belt width | Exact width in mm (500, 600, 800, 1000, etc.) |
| Belt length | Total circumference or cut length needed |
| Total thickness | Measure existing belt or state required thickness |
| Carcass type | EP (polyester/nylon), number of plies |
| Cover grade | General purpose, oil-resistant, heat-resistant |
| Surface profile | Smooth, textured, or with cleats |
| Minimum pulley diameter | Required for proper flex |
| Operating temperature | Peak process temperature |
| Belt speed | Meters per minute or feet per minute |
| Load capacity | Weight per unit or total load |
| Joining preference | Mechanical, cold bond, or hot vulcanize |
| Environmental compliance | Anti-static, EN 12882, cleanroom rated |
A complete order looks like this: “Rubber conveyor belt, width 800 mm, total thickness 9.5 mm, EP carcass, 3-ply, top cover 5 mm, bottom cover 1.5 mm, general-purpose rubber, cut edges, anti-static compliant.”
Connecting Specs to Your Production Line Needs
For SMT and electronics manufacturing, these details hit different. Width tolerance directly affects transfer precision. Thickness determines how the belt sits on your pulleys. Cover compound determines whether the belt survives near a reflow oven or wave solder machine.
If you’re sourcing from suppliers like Shenzhen Chuxin Electronic Equipment Co., Ltd., confirm they can supply standard widths that match your existing line specs. Custom widths take longer and cost more. Standard line compatibility matters for quick turnaround.
Lead-free and environmental compliance matters more in 2026. Belts near soldering equipment need heat-resistant compounds. Belts in clean areas need low-dust, anti-static construction to protect sensitive assemblies.
Making Belts In-House vs. Ordering
Here’s something people get confused about. When people ask “how to make rubber conveyor belt,” they usually mean cutting and joining from existing stock. That’s practical. What they’re not thinking about is the actual rubber belt manufacturing process, which requires internal mixers, calendering equipment, and vulcanizing presses.
Most SMT production facilities don’t have that equipment, and they don’t need it. You buy belt stock in rolls or cut-to-length sections, then fabricate what you need in-house. This keeps lead times short and waste down.
The exception is companies running specialized belt compounds for unique applications. Those usually work directly with manufacturers on custom orders.
Conclusion: Expert Recommendations for Reliable Belt Work
Here’s what matters most when you’re working with rubber conveyor belts on an SMT line. Get the basics right, and everything else gets easier.
The sequence works like this: identify your belt type and match it to your environment, prepare safely with proper lockout/tagout, cut square every single time (this is where most tracking problems start), choose the right joining method for your speed and load requirements, clean with compatible materials, and verify tracking and tension before you put the line back into production.
That sounds simple because it is simple. The hard part is actually doing it consistently.
For your production team, here’s what I’d recommend putting in place right now if it isn’t there already: document your belt specifications somewhere accessible, not buried in a spreadsheet from three years ago. Standardize your maintenance checklists so the procedure doesn’t depend on who happens to be on shift. Train operators on the why behind the steps, not just the steps themselves. Keep approved splice kits and cleaning materials on hand, and involve your belt or equipment OEM for any high-risk applications or warranty-sensitive work.
A quick checklist for your next belt maintenance job:
- [ ] Lockout/tagout completed and verified
- [ ] Belt type and specifications confirmed
- [ ] Proper cutting tools on hand and in good condition
- [ ] Joining method matched to application requirements
- [ ] Tracking and tension verified before full production restart
Disclaimer: Always follow your belt and conveyor OEM manuals for safety-critical or warranty-sensitive maintenance procedures. The techniques in this guide are general recommendations for reference purposes and may not apply to all equipment configurations or belt compounds.